
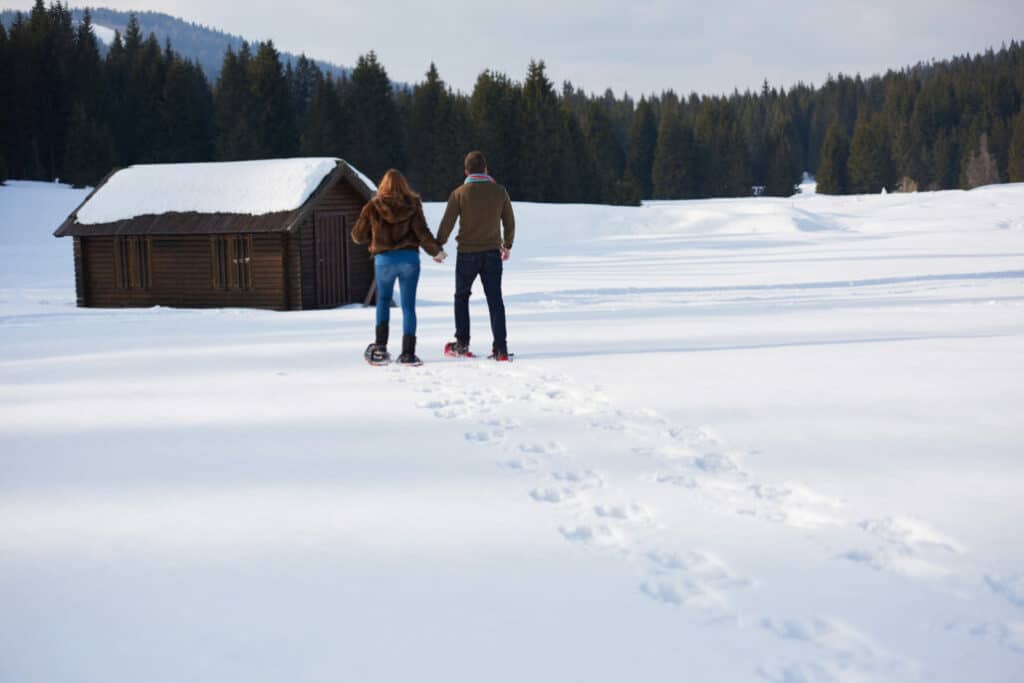
When the snow hits the ground, most adrenaline seekers usually have their sporting options limited, except for crosscountry skiers who have learned to appreciate and play in the freezing weather.
Crosscountry skiing as a sport and recreational activity attracts thousands of people ranging from ordinary hikers to nordic downhill skiing enthisiasts, all seeking a tougher but affordable thrill- a nice cross country ski sure offers this and more.
The thrill however does not come as easy as most professionals try to sell it; it takes hundreds of training hours to get the moves right and avoid accidents. There is a lot of information out there on the basic xc skiing styles (classic and skate skiing) but there isn’t much on speed control and safe stopping.
Most trainers believe that with a few smart propulsion techniques, a novice is good to go but we disagree; how you stop is as important as how you propel so every skier must learn the basic stopping and speed control methods.
Table of Contents
- 1 So, How Do You Stop On Xc Skis?
- 2 4 Easy Speed Control And Stopping Techniques For Cross Country Skiers
- 3 Below Are Several Smart Tips You Can Employ To Make Your Tucking Experience Safer And Less Complicated.
- 4 How To Maintain Balance On Cross Country Skis
- 5 How To Safely Glide On Cross Country Skis
- 6 How To Safely Use Skiing Poles On The Track
- 7 How To Go Uphill On Cross Country Skis
- 8 How To Go Downhill On Cross Country Skis
- 9 Safety Precautions For Gliding On Cross Country Skis.
- 10 Bottom Line
So, How Do You Stop On Xc Skis?

There are 4 main speed control techniques in cross country skiing; snowplow, tuck, step turns, and parallel skidding. These techniques can be used collectively or singularly depending on the desired outcome; you could be looking to make a sudden stop, slow down or navigate a corner.
Many beginners ask; what are the main techniques used in crosscountry skiing? Should I learn all of them or simply become a master of one? Whichever option they go for depends on their trainer’s preference but we recommend learning all or at least the basics of each. Skiing terrains are most of the time unpredictable- having a few extra techniques often comes in handy.
Learning speed control not only improves your safety but also raises your confidence in the wild or skiing downhill.
4 Easy Speed Control And Stopping Techniques For Cross Country Skiers

Over the years, professional cross country skiers have developed several stopping techniques, some of which we see on the track today and others they kept for themselves. The list is pretty long so we narrowed it down to 4 of the most fruitful, practical, and safe.
Snowplow
This is the first braking technique every beginner learns before their risk appetite pushes them to learn others. Snowplowing is simple but cab be surprisingly effective especially in a slight downhill ski.
You can learn snowplowing from almost any seasoned skiing instructor and with the basics, you can practice on your own. If you can’t afford an instructor, there’s a second option; self-training.
Training on your own will have its challenges but with a proper pair of cross country skis and a proper training ground, you should be good to go.
How To Practice The Snowplow Technique
Position your cross country skis at a V-shaped angle but without crossing or touching each other. From there, bend your feet a little bit so the inner edges of the skis will appear to be pressing into the ground.
Before embarking on your glide, ensure you can clearly see where you are going and that all noticeable obstructions are accounted for. Also, do not be distracted by the people around you or what they are doing; focus on yourself and the task ahead- this lets you anticipate the stop so it won’t catch you by surprise.
Your upper body should be steady and facing the travel direction before starting the glide.
Now, with everything in check, you can begin your glide. The speeds will be mild at the beginning but as you gain momentum, you’ll notice a change.
Try as much as possible to maintain the skis at a V-shaped angle and slightly open and close the angle to regulate the speed. These simple ski movements are the foundation of the snowplow technique.
If your trail has corners, the turning part will be a bit different. When turning left, shift your body weight to the right-hand side and watch the skis curve in the intended direction.
Turning at high speeds can be tricky so we recommend more training on this part. You can start by switching the turn direction to see which is easier and at what speed. As things unravel, you’ll know which side is safer to turn at high speeds, when you are carrying loads, and when the slope is steeper than normal.
It goes without saying that you must practice turning on both sides; you’ll be tempted to master one side and run with it but in the long term, half-backed cross country techniques are as useful as no technique at all.
You should repeat these steps as much as possible until you feel confident enough to hit the tails on your own.
The snowplow is a must-have for every beginner xc skier as it is a safe and almost perfect method to keep a tab on your speed. After several training sessions, you should be able to control your skiing speed and safely shift from fast to slow and then stop.
These are very useful skills on the track because obstructions can pop out of anywhere at any time; it could be a low-hanging tree branch, a dead log, or even fellow cross country skier you were not briefed about.
Parallel Skidding
In crosscountry skiing, turns are inevitable. At high speed, a sudden change in direction can have fatal consequences if not done right especially for alpine skiers.
There are two approaches to this predicament; you can choose to employ the parallel skidding technique or the step-turn, either will serve just fine. We’ll look at parallel skidding in this section and step-turns in the next.
Skid-turning can be likened to downhill turning as the two share a few key aspects. In both, the skis are maintained in a parallel position, on edge, and only curved when navigating a corner.
Skid-turning as a speed control technique works best when you need to reduce speed. It is preferred by many because it earns the skier more control over their momentum as compared to other techniques like step-turning.
Your ski angle in a cross country skiing race will have a major effect on how fast you glide and how much control you have over your speed.
Parallel skidding calls for multiple hours of intense training to master but out of experience, we can say, it is worth every drop of sweat.

Step-Turns
Step-turns is the go-to technique for experienced skiers and alpine skiers who have faith in their speed control abilities in competitive crosscountry skiing. Continuous propulsion with minimal or zero braking will naturally result in high-speed gliding which is extremely risky particularly on trails with sharp corners and uneven slopes.
Whenever you find yourself in such a situation, the most promising option is stepping off the track; it sounds easy but getting off a track during a high-speed glide is not a move for the faint-hearted.
Step turns are mainly witnessed in professional ski races where the skiers try to glide around sharp corners by making small but very fast sideway
Step turns require continuous stepping around the curve starting with the inner ski and followed by the outer one. The technique lets you navigate tight corners at high speeds but at the same time limits your control over everything else as your attention will most likely be pinned on the current and next step.
Step-turns serve pretty well in sharp and steep corners but not so much in too-sharp corners. Even with your mastery of step turns, there are some corners you simply cannot go around at high speed unless you are known to cheat death- this is where parallel skidding comes in.
Skidding into a corner and then quickly switching to step turns to get yourself out is a smart and safe combination for when things get risky.
Another way is utilizing all the space around the corner to contain the intense speed- the way rally drivers navigate corners.
As you approach the turn, move from the outer ski space into the inner area or the middle part and as you go around the corner, you can slowly move outwards. This will reduce the chances of you going off track since by the time you reach the outer edge of the track you’ll have gotten past the corner and onto a straight trail.
This method lets you reduce the turning angle without compromising on stability and safety.
Tuck
This is the safest and fastest cross country skiing technique for downhill runs even for alpine skiers- with a lower tuck, comes faster gliding and better balance. The only downside to this technique must be the tremendous strain it puts on your body muscles as you constantly bend and stand on your skis.
There’s a way out of this disadvantage though- high tucks; they create a sort of break time during a glide when you can rest your muscles before the subsequent push.
The best areas to apply the tuck technique are classic track-set turns and straight sections.
To maintain safety on the track for yourself and other skiers, we highly advise against tucking your poles under the side arms on a downhill run. This maneuver is not only dangerous to you but to your colleagues; holding the poles this way aims the tips directly toward the person behind you and this can prove fatal when they get too close.
The tuck technique is a proven technique for reducing drag and maximizing pace when going downhill.
Below Are Several Smart Tips You Can Employ To Make Your Tucking Experience Safer And Less Complicated.

The first on the list is; keep your head up. Most accidents on the track result from distractions which you can easily avoid if you keep your head up and focus on the trail ahead.
Whether you are skiing on a private or public trail, always anticipate traffic and be ready to handle any unforeseen obstructions. Letting your guard down because you don’t see other skiers close by can be dangerous.
The second tip is; maintain your center of balance. To do this, you’ll need to part your feet and knees to create a gap thereby solidifying your center of balance and level of traction.
The elbows go between the knees in a forward position. You should not rest your elbows on your knees as this can be quite uncomfortable when going over bumps.
Remember, the poles are the most sensitive pieces of gear at this point; always place them behind you for safety purposes.
The last tip on the list is; learn to use your hip movement to your advantage when making turns. The hips should move in the direction of the turn and inside every time. We borrow this from alpine skiers who place their heads outside of the turn and let the hips remain inside.
This tip works to control the massive gravitational force created when you effect a sudden change in direction with your skis still grounded.
How To Maintain Balance On Cross Country Skis

Learning cross country skiing is not that hard, you can simply strap your skis on and tremble your way into a basic glide. That sounds fun but not enough; you need to master the art of balance to make it around a loop on the track.
Learning balance will not only save you from embarrassment on the track but also contribute to a better long-term track experience for you.
There are multiple angles to it but we recommend a basic athletic stance for the initial days of training.
Basic Athletic Stance Position
- Stand up straight, relax your body and part your feet slightly (shoulder width apart)
- Bend your ankles and knees slightly enough to bring your hips right above your feet.
- Bring your hands forward a little and maintain this posture.
- Slightly bounce your torso vertically and focus on the feeling of pressure increase and decrease on your feet’s balls.
Basic Balance On One Foot
A cross country skier cannot bag of their mastery if they cannot balance themselves on one foot. Cross country skiing is all about propulsion which is a result of the constant shifting of weight from one foot to the other.
As you do this, there is a period in which your body balances on one foot. The interchange period might only be a microsecond long but its essence is undeniable so, basic one-foot balance training is a must for every skier with long-term sporting goals.
Here Is A Step By Step Guide To Balancing On One Foot;
- You can begin with the basic balance stance in the previous section.
- Stand on one foot, swing the free foot backward and bring the opposite arm forward– this will create a counterbalance within your body.
- Concentrate on the weighted foot and ensure the toe, knee, and hip on this foot are vertically aligned to maintain undisturbed balance on the subject foot’s ball.
- Switch feet and maintain the same position. Remember to align your knees, toes, and hips like on the other foot.
- Repeat the process several times or until you’ve mastered the basic aspect of it.
How To Safely Glide On Cross Country Skis

Now, we’ll tell you how you can safely glide down steep hills in your skis. The initial stages of moving on skis will not entail much; we will start with perfecting the balance stance you already know but this time we’ll do it with skis on.
Shuffle
Skis will definitely feel cumbersome on your feet in the beginning but worry not as it only takes a few days to get used to the new feel. You can make the discomfort worthwhile by practicing a few basic moves like shuffling as you ski downhill.
You can shuffle down short descents and gradually proceed to steeper ones as your confidence Improves. The purpose of this stage in training is to let your body get a feel of actual skiing.
The first time feels like walking on snow but after a few attempts, you begin to appreciate the importance of each stride.
Try Shuffling And Gliding
Gliding is the intentional and controlled motion on snow using skis. It is what separates skiing from hiking. It makes up a big part of the whole cross country skiing experience.
The shuffle and glide drill is made up of two stages; the shuffle which we just talked about and the glide.
Here’s How it’s Done;
- Begin with the basic shuffle.
- After a few shuffles, concentrate your weight on the front ski and try to glide on it for a few seconds.
- Repeat the shuffle and glide motions a few times until it feels less straining. After sometime, you should be able to do it over a longer distance- this is called the kick and glide method in classic cross country skiing.
How To Safely Use Skiing Poles On The Track

Cross country skiing poles not only help you balance yourself on the snow but also add to your push power. Never use the pole tips as a braking tool by planting them in front of you in descent.
The drills below should help you better understand how best to use ski poles; holding, planting, and pushing off.
Grasp The Poles Firmly And Correctly
The poles come with a strap that you should loop around your wrists. They’ll allow you to efficiently employ the poles to effect motion without the need to constantly hold them firmly to avoid losing your grip.
This Is The Best Way To Grasp You Poles;
- Drop your hand through the strap loop so the strap runs around your wrist.
- Hold the edge of the strap and pole grip simultaneously so the strap is firmly held against the grip.
- If you can’t grasp the pole at the right spot (just below the top) you will need to adjust the strap’s length. If the strap is correctly adjusted, the area where the strap attaches to the pole should be level with the top of your hand.
Simple Pole Movement
At this stage, we’ll introduce poles to the propulsion equation. This will slightly increase your speed and power as you glide.
- Start with the balance stance to initiate your glide. Put your hands out forward and at shoulder width- the pole should be hanging down from your hands. Bend your elbows at 90°, so the top of your hands is level with your mouth.
- Kickstart your core muscles as you plant the poles into the snow– they should stand at a right angle with the ground.
- Now lift the poles back up to their initial position and then plant them again. Repeat this exercise several times. This is the most basic form of pole movement in cross country skiing.
Diagonal Strides
Simply put, this is a combination of shuffling, gliding, and pole movement.
- Start by performing the shuffle and glide combo on your skis.
- Incorporate the pole movement method you just trained on into the shuffle and glide combination but do not use both poles simultaneously just yet. For now, just use each individually.
- With one stride already in, make a backward poll push using the pole opposite your striding side. This will create an arc that leads the top of the pushing hand near the pockets of your front pants.
- Repeat the above activity on the other pole and ski. Remember to push off the tip of the pole, this helps propel your stride further.
To gain the most out of your diagonal strides, ensure your polling hand and the striding leg move in collaboration, if not, you’ll end up straining more for less distance.
Once you’ve mastered the diagonal stride, all that’s left is practice and understanding what works for you. You can try the different cadences to get a feel of each.
Long glides for example will strain you less while short quick strides will wear you out faster but at the same time get you uphill more easily.
How To Go Uphill On Cross Country Skis

We recommend ski tracks with lots of flat terrain for most skiers in the initial stages of training but a time will come when you’ll have to face and overcome a hill. We’ve listed below a few ascending techniques you can employ as you uphill ski.
They come in the same order we’d expect you to use them.
Diagonal Stride
The diagonal stride is the most effective uphill skiing technique for slightly steep hills. It helps faster skiers maintain momentum throughout their glide while still conserving body energy.
Make sure each stride is firmly pressed on the snow, this pushes the grip zone down onto the snow.
If the hill is too steep for diagonal strides, we recommend the next technique on this list; the herringbone technique.
The Herringbone Technique
The technique is named after the unique pattern your skis leave on the track. This technique is your go-to tool for overcoming steep and risky hills.
The technique is best practiced on flat ski tracks before hitting the hills.
How to do the herringbone technique;
- The first step is to jump out of the tracks and position your skis in the middle of the ski trail. We do this to preserve the already prepared tracks.
- Form a V-shape with your skis; the wider side should face the front.
- Bend your knees and ankles inwards to push the inner edges of the skis into the snow.
- Make short and light steps. Try as much as possible to maintain the V shape and avoid crossing the skis’ tails as you move; they should not go over or in front of each other.
- To move forward, we use the same opposite arm or leg formations as we trained in diagonal strides. You should place your poles slightly behind the skis to maintain your balance and avoid sliding backward.
- Keep up the V shape and small steps as you move stride uphill.
The width of the V shape will depend on the steepness of the hill. For steeper hills, you’ll need a wider V to push the inner edges deeper into the snow.
Side-Steps
Side stepping is slightly slower than the herringbone style but it is also an effective ascending technique.
How to side-step;
- Step into the center of the track and place your skis in a parallel formation facing the hill.
- Tilt the edges towards the slope by bending only your lower feet.
- Push off with the downhill ski and use the momentum to effect a side step with the uphill ski.
- Shift your body weight to the uphill ski, this will lighten up the downhill ski enabling you to lift it up and place it next to the other ski.
- Repeat these movements until the hill is behind you.
Unstrap And Walk
Corny as it may sound, when everything else fails or seems too complicated you can always walk uphill.
It is as basic as it can get; take off your skis and slide into your ski boots– you can move to the outer area of the trail to avoid ruining the nice groom.
How To Go Downhill On Cross Country Skis

A typical cross country skiing tour should have a series of uphill, downhill, and flat runs; too much or too little of any will make it stale. Unlike uphill and flat terrain skiing, gliding downhill skis can be unstable and can be dangerous.
In previous sections, we’ve talked about skiing uphill and now, we’ll explore the various techniques for skiing downhill.
As we delve into it, we must mention the correct way to hold your skiing poles when going downhill; they should be behind your skis with the tips off the snow. Poor handling of the poles in a fast downhill glide can be fatal.
There are several skiing techniques targeted at downhill skiers but we’ll mention two of the most effective and workable.
Gliding Down
If the slope is gentle, you don’t need to do much; you can sit on the tracks and let gravity propel you downhill.
How to glide down;
- Put together a normal balance stance (we have a section for that above).
- Bend your knees and ankles softly to initiate propulsion. You can put your hands out in front of you for balance.
- With your ski poles safely held, glide effortlessly down the run.
Half-Wedge Braking
We recommend this technique for when you need some braking along the glide.
- Get your one ski off the track and concentrate your body weight onto the outer ski- you should be comfortably balanced atop the grounded ski.
- Position the raised ski to face the track and lay it on the ground. You can angle the edges to face you for a better experience.
- Use the angled ski for braking by adding more weight to it. Play with the weight shifts to control your speed.
- When safely down, return the braking ski to its original track and glide away.
Wedge-Braking
This is the first braking lesson in an alpine skiing class before they let you put on the skate or Nordic skis, it’s also called the triangle style or full wedge. The triangle technique is done entirely off the groomed trails and offers stronger braking power compared to the half-wedge.
How to perform a full wedge;
- Shift from the main track to the center of the ski trail.
- Make a wedge shape with your feet so your heels angle out and your ski tips face each other.
- Lean your lower feet inwards, this will push your skis’ inner edges down.
- You should maintain equal pressure on both skis’ inner edges to even the braking power.
- When you need stronger braking power, press harder on the inner ski edges or widen the wedge.
To gain a little more experience with the full wedge, try out different wedge widths- a narrow wedge should result in acceleration while a widened wedge will help you slow down.
Safety Precautions For Gliding On Cross Country Skis.

Stay Warm
Some cross country skiers get carried away by the adrenaline rush and forget to adjust their layers of clothing accordingly. Don’t wait until the cold reaches your bones to get warmer clothes.
We recommend hand warmers, leg warmers, and a warm beverage to carry along when out skiing in the wild.
You should adjust the clothing layers when you get too hot as well; excess moisture under your garments can chill you.
Avoid Unknown Or Unpredictable Terrain
If you are yet to master the various high-risk cross country skiing techniques and wild survival skills, you are better off skiing on flat and lowland ski areas.
You can also ski in a resort or community ski grounds with regular patrols for when you can’t find your way home.
Know How To Find Your Way Around
If the skiing area does not have established cross country trails, have a topographical map or GPS.
In addition, learn basic map reading skills before heading out.
Fall Correctly
There cannot be cross country skiing without the occasional tumbling but if done right, falling when cross country skiing can be made safe.
Avoid sticking your poles out when you sense a lack of balance; this increases the chances of injury and gear damage.
A safer option is rolling over but only if you have control of your body and know where you are rolling towards- you don’t want to roll into a log or spiky tree stem.
Bottom Line
Learning braking techniques in cross country skiing is as important as learning acceleration methods; if you miss the former, the consequences could be catastrophic. To stay safe in the wild and make your time in the cold worthwhile, we recommend learning braking techniques like snowplow, tuck, step-turn, and parallel skidding.
We cannot stress enough the need for repeated practice to master these techniques; you’ll never know when a real-life situation will need you to make a sudden stop on a steep downhill run.
Some of the areas we insist practice on include;
- Handling unexpected obstacles on the track
- Redirecting your glide on a downhill glide
- Stepping in and out of the tracks when the need arises
All it takes to slow down or stop on cross country skis is a few basic skills and some confidence.
