
Ah, the vast wonders of the cosmos! If you’ve ever looked up at the night sky and felt a sense of awe and curiosity, then you’re in the right place. In this beginner’s guide to astronomy, we’ll shine a light on the basics you need to embark on your celestial journey.
So, where do we start? The first step is to simply step outside and gaze at the stars. Over time, our familiarisation with the constellations and patterns in the night sky will grow, aided by resources like the monthly naked-eye star charts. You’d be surprised at how many celestial objects you can spot just with the naked eye! In fact, planets such as Venus, Mars, and even Jupiter can be seen without a telescope. Neat, right?
Now that you’ve dipped your toes into the cosmic waters, it’s time to enhance your stargazing experience. A good first investment is a pair of binoculars or an affordable telescope—these can be found at a variety of price points, allowing you to see further and more clearly into the great unknown.
Once you’ve got your shiny new equipment, subscribe to online forums, and treat yourself to some in-depth resources such as The Planetary Society‘s articles. Trust us, your cosmic fascination will grow, and you’ll find yourself itching to learn more!
Table of Contents
- 1 Getting started with Astronomy.
- 2 Equipment and Tools
- 3 Observing the Night Sky
- 4 Astronomy Terminology
- 5 The basics of astrophotography.
- 6 Finding a good camera.
- 7 Different styles of astrophotography.
- 8 Your camera.
- 9 Technique.
- 10 ISO.
- 11 Using your new camera.
- 12 Hiking gear and equipment.
- 13 Using light sources to experiment with astrophotography.
- 14 When is the best time to take photos of the night sky?
- 15 Tools for checking the phase of the moon.
- 16 Where do I go to take pictures of the night sky?
- 17 What do I do if I can’t travel out of the city for astrophotography?
- 18 How To Be Successful With Astrophotography.
- 19 Editing Your Photographs.
- 20 Joining the Astronomy Community
- 21 Further Resources and Reading
- 22 Conclusion.
Getting started with Astronomy.
Delving into the realm of astronomy can be a truly awe-inspiring experience, as we explore the vast wonders of the universe. It’s time to unravel the mysteries of the cosmos together!
Celestial Objects
As we embark on this celestial journey, let’s first familiarise ourselves with some of the most common objects that populate our night sky:
- Stars: These burning balls of gas, including our very own Sun, light up the night sky with their incredible nuclear reactions.
- Planets: From the rocky inner planets like Earth and Mars, to the gas giants Jupiter and Saturn, these celestial bodies orbit around stars and come in various sizes and compositions.
- Moon: A natural satellite like Earth’s moon, these objects orbit planets and can be seen reflecting their parent planet’s light.
- Asteroids and comets: These rocky or icy travellers wander through space, sometimes crossing paths with planets and presenting us with extraordinary astronomical events.
- Galaxies: Colossal gatherings of stars, planets, gas, and dust, galaxies like our own Milky Way are the building blocks of the universe.
Now, how about we venture deeper into the universe? After all, curiosity is the fuel that propels our cosmic expedition!
Observable Universe
The observable universe encompasses everything that is, well, observable to us. Despite its vastness, there’s still so much we’ve yet to discover. But the night sky doesn’t need to be a perplexing puzzle – with a mix of naked-eye observations and telescope-aided stargazing, we can demystify the wonders above.
For instance, the Sky & Telescope magazine offers monthly naked-eye star charts to help us trace various constellations, identify planets, and even locate galaxies on a clear night. Exciting stuff, isn’t it?
As we continue to explore and learn about the universe, our passion for astronomy is bound to grow stronger. The more we discover, the more we’re struck by the sheer vastness and beauty of the cosmos. So grab your telescope, and let’s voyage through the stars together!
Equipment and Tools
Embarking on the thrilling journey of becoming an amateur astronomer requires the right tools and equipment. From telescopes and binoculars to star charts and even your own eyes, we’ve got you covered. So, let’s take a peek at the essential equipment to fuel your cosmic curiosity.
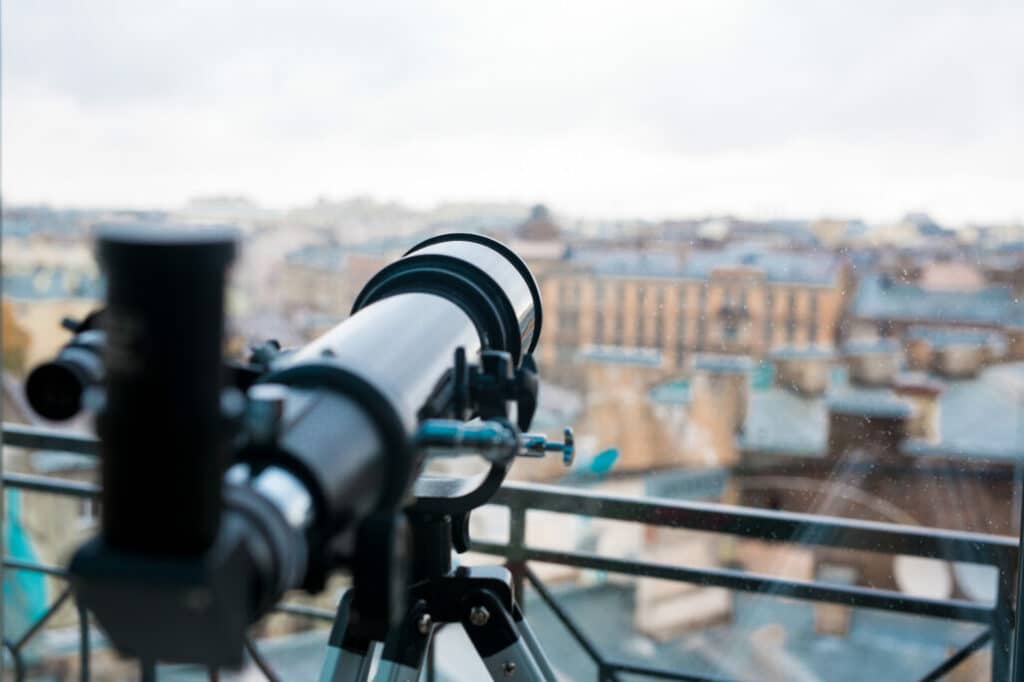
Telescopes
Every aspiring astronomer dreams of peering through a telescope and discovering distant celestial wonders. But before you jump in and buy the biggest, most expensive one available, consider your needs and budget. For beginners, we recommend starting with smaller telescopes, as they’re generally easier to transport and operate . There are four main types of telescopes to choose from: reflectors, refractors, hybrid and Dobsonian. Do your research and find the perfect fit for you!
Binoculars
Don’t let owning a telescope overshadow the importance of a good pair of binoculars! With their portability and simplicity, binoculars are perfect for stargazing on the go. Did you know that you can even spot Jupiter’s moons or the Orion Nebula with the right binoculars?
Remember, it’s not always about magnification, but rather a balance between power, aperture, and field of view. So, we invite you to weigh up the pros and cons, and choose a pair that will show off the night sky spectacularly!
Star Charts
No budding astronomer should leave home without a trusty star chart. Navigating the night sky is a breeze with these maps that are tailored to your specific location and time of year. You’ll easily locate constellations, planets, and other celestial formations with ease once you get the hang of it.
Traditionally, there are paper charts, but let’s not forget the digitally savvy among us! There’s an array of stellar apps (pun intended) and software available to guide you through the cosmos on your smartphone, tablet or computer. Go ahead, and embrace your inner celestial cartographer with a star chart that suits your style.
In conclusion, the best way to enjoy the night sky is by arming yourself with the right equipment and knowledge. Embrace your enthusiasm and dive into the vast world of astronomy using a combination of telescopes, binoculars, and star charts. You’ll soon find yourself staring into the great unknown with wonder and awe.
Observing the Night Sky
Are you ready to lift your gaze to the heavens and witness the marvels that await us in the night sky? Join us as we delve into four captivating aspects of the cosmos: Constellations, Moon Phases, Planets and Their Movements. We’ll guide you on this journey through space with humour, knowledge, and a sense of wonder that can only be found when uncovering the secrets of the universe.
Constellations
The first step in our night sky exploration is identifying the constellations – those captivating patterns of stars that have delighted and guided humans for millennia. Did you know there are 88 officially recognised constellations?
Don’t worry, though, we won’t attempt to learn them all at once! Instead, start by looking for some of the most famous patterns like Orion, Ursa Major, and Cassiopeia. Want a helpful tool to make this journey easier? Try using star wheelsto quickly learn star names and constellation shapes. You’ll soon impress your friends with your celestial knowledge!
Moon Phases

Our beloved Moon, Earth’s most stunning natural satellite, has a real knack for capturing our imagination. Have you noticed that its shape seems to change? That’s because the moon goes through phases caused by its orbit around Earth.
Within a month, our rocky companion goes from a new moon to a waxing crescent, first quarter, waxing gibbous, full moon, waning gibbous, third quarter, and finally a waning crescent before starting the cycle anew. Observing and tracking these phases can be an exciting and rewarding experience!
Planets and Their Movements
Now that you’re familiar with the grand cosmic dance that is the constellations and moon phases, it’s time to move on to the real showstoppers: the planets! With a small telescope or even binoculars, you can observe the beauty of our neighbouring celestial bodies. Did you know that with the right tools, you can see Saturn’s rings and Jupiter’s stripes? Fascinating!
Planetary movements are another way to enrich our understanding of the cosmos. For example, you might’ve heard of phrases like “Mars is in retrograde” or “Venus is rising.” Becoming acquainted with planetary movements will not only help you find and observe these heavenly bodies but will also lead to a deeper appreciation of the intricate dance they perform in our sky.
Embark on your night sky journey equipped with curiosity, wonder, and a sense of camaraderie as we explore the cosmos. You’ll soon find yourself falling in love with the magical world above us. Happy stargazing!
Astronomy Terminology
Before venturing into the awe-inspiring realm of stargazing, it’s essential to familiarise ourselves with some basic jargon. Let’s dive into a few terms that frequently pop up in astronomical conversations, and soon, we’ll be tossing these words around like seasoned astronomers ourselves.
Atom: The building blocks of everything around us, including stars and galaxies. Atoms are made up of protons, neutrons, and electrons, and they come in many flavours such as hydrogen, with one proton and electron, or carbon, which boasts six of each .
Did you know that most of the visible universe consists of hydrogen and helium? Just two types of atoms among so many out there – talk about minimalism in design!
Asteroid: These fascinating rocks dwell primarily between Mars and Jupiter. Most are only a few miles across, and spotting them using a small telescope can be quite the challenge . Occasionally, these rocky bodies venture closer to the Sun, crossing Earth’s orbit and showcasing cosmic drama!
- Aurora Australis and Aurora Borealis: Referred to as the Southern and Northern Lights, these mesmerising light displays result from charged solar particles interacting with Earth’s atmosphere. The stunning natural light shows paint the night sky in vibrant hues of green, blue, and purple.
As we delve deeper into astronomy, we’ll encounter numerous terms that may leave us puzzled. But hey, we’re in this together! We’ll learn, giggle at the jargon, and confidently discuss wonders such as the zodiacal light, nebulae, and globular clusters.
So, how about we raise a metaphorical toast to our newly acquired knowledge and the many celestial discoveries that await us? Happy stargazing!
After you have understood the basics of astronomy, you should be able to take it to the next level and continue with astrophotography.

The basics of astrophotography.
Your first question will obviously be around the camera you need. Before you think about getting a camera, we recommend spending some time outdoors at night and becoming familiar with the night sky.
If you live in a big city, you may want to find a spot that has less light pollution as this can improve your view.
It may be worth traveling some distance to a place that has less light pollution as you will see so much more.
Once you have found a spot that you like, regular visits there at night will get you acquainted with the various stars. Remember to take things slowly and to simply enjoy what you see when looking up.
Finding a good camera.
Unfortunately, if you have a basic “point and shoot” camera, this is not going to help you at all to take decent photos of the night sky. Your smartphone camera (no matter how advanced it is) will also do a poor job.
This is the only drawback to astrophotography as a good quality (i.e. expensive) camera is essential. When shopping for a camera, there are certain characteristics that you need to pay attention to but we will touch on this later on in this beginner’s guide to astronomy and astrophotography.
Different styles of astrophotography.
Did you know that there are different ways of photographing the night sky? The style that you ultimately decide to go with will all depend on what you enjoy the most.
In short, astrophotography can be divided into 2 main types: long exposure shots and short exposure shots.
When it comes to astrophotography, the shutter speed (or exposure time) is very important. This relates to the speed at which your camera’s film or sensors are exposed to the light. Another way of looking at this is how long the shutter remains open.
Your camera’s shutter speed can be incredibly fast and can reach speeds of up to 1 thousandth of a second to several seconds.
When you take pictures of objects in normal light and under normal conditions, you would usually use quite a short exposure. For example, if you want to take a picture of your dog running around in your yard during the day, you will use a short exposure.
This results in a clear and crisp picture, despite the movement of your dog. Short exposure works to “freeze” the object in time so that you have a clear image.
If you are taking pictures of the stars in the night sky, using a short exposure for your shot will also result in clearer and crisper images.
Longer shutter speeds are normally used to capture images in the daytime. However, because the night sky is naturally very dark, it is better to let in as much light as possible with a longer shutter speed. This will give you better-looking pictures.
Long exposure is also regularly used in astrophotography. This creates a special effect and the stars that you capture look as if they are swirling around in circles. Such photos can look incredible and if you want to create these “star trails”, you would need to use a long exposure.
Of course, how you use your camera is down to your own, unique photographic style and what you prefer.
For best results, we advise thinking about the kinds of images you want to produce and adapting your photographic style accordingly.
One thing’s for sure, once you have captured your first few images of the dark night sky, you will be tempted to improve your technique and go one step further.

Your camera.
As mentioned in this beginner’s guide to astronomy and astrophotography, you will definitely need a good camera to take decent photos.
You will need a DSLR camera and possibly also a good telescope. Fortunately, you don’t have to spend thousands of dollars on a new camera as there are some great and affordable options out there. Just make sure that your camera is a DSLR model, even if it is an entry model.
Generally speaking, you should be able to pick up an excellent DSLR camera for well under $1000.
Astrophotography experts normally recommend that beginners look at reputable camera brands like Canon, Sony and Nikon.
Technique.
When you look at an object in the night sky, it is usually just a faint speck and if you want to photograph this object, you need to use a special technique so that your picture turns out well.
Even though humans can easily spot the little specks of light that are stars, cameras have a more difficult time and, if not done correctly, will capture them as a solid black object.
What this means is that your camera needs to compensate for the darkness. You can do this by using the correct shutter speed. The slower that your shutter speed is, the more light it will admit into the camera, and the better your pictures will turn out.
Knowing how your camera’s aperture works is another important aspect of understanding how to take great photos of the night sky.
The aperture refers to the diameter of your camera’s lens (into which light comes through). The wider your aperture is, the better quality your photograph will be.
Unfortunately, cameras with wider apertures tend to be more expensive and can be heavier to carry around with you. The key here is therefore balance and it would be a good idea to buy a camera that has a larger aperture but a slower shutter speed. This will result in more light being captured in your nighttime images.
ISO.
ISO is an important factor to consider when buying a camera for taking photos of the night sky. The ISO of your camera refers to how sensitive to light your camera is.
This concept can get quite technical but all you really need to know is that the higher the ISO of your camera, the better and brighter your images will be.
On the flip side, as the ISO of the camera increases, there will be more and more clutter originating from ambient light and light pollution in the background. Again, balance is key but if you are just starting out with astrophotography, we recommend getting a camera with a longer shutter speed, a higher ISO (preferably anything between 400 to 1600 and beyond) and a wide aperture.

Using your new camera.
Once you have purchased your new camera, as boring as it may sound, read through the user manual carefully to fully understand how it works!
Each camera has its own intricacies and adjusting the settings will be different on each model. If you are still confused after reading through your user manual, there are plenty of YouTube tutorials online showing you how best to use your camera.
Camera accessories.
In addition to a really good camera, you will need some other accessories to help you along with your astrophotography journey.
Here is a list of some of the basic accessories you will need:
- suitable lenses for your camera
- a wide angled wide aperture lens
- a good quality tripod
- a headlamp or a well-constructed flashlight
- some hiking gear if you plan on hiking to your astronomy spot
Lenses.
Every camera comes with working lenses but for astrophotography, you will definitely be needing a wide angled wide aperture lens. This improves the quality of our nighttime pictures and is well worth the investment.
Tripod.
Spend a bit of time picking out the most suitable tripod for your camera. A great tripod is vital for astrophotography as it helps to keep your camera perfectly still while taking photos so that they don’t turn out blurry.
A tripod is even more important if you think you will be using slower shutters speeds.
If your camera happens to move even a fraction during the exposure process, your images will be less than adequate. A tripod gives the camera much-needed stability.
Don’t worry about the tripod being cumbersome if you need to walk to your photography spot because there are some excellent lightweight ones out there. Look for one that is made from carbon fiber as this material is particularly light and easy to carry around with you.
Many cameras move a tiny bit when the user presses the shutter button. To combat this movement, you may want to use the timer on your camera so that it takes pictures when it is as still as possible.
There are some great tripods on the market but always be sure that it will work well with your camera and consider trying it out before you make a purchase.
Headlight and a flashlight.
The function of a headlight or flashlight is self-explanatory. You will need one of these as you’ll be working in the dark and you need to see what you’re doing!
Obviously, if you’re busy taking photos, try and not use your headlight or flashlight at all. If you really need to use it, set it on the lowest possible setting so that it doesn’t ruin your camera’s exposure.
Another factor to consider with a head lamp or flashlight is to get one that has a red light setting. If you continuously use a white light, this will eventually destroy your body’s night vision! Red lights illuminate your way and don’t ruin your night vision.
Hiking gear and equipment.
Many astrophotography enthusiasts live in big cities and have to travel to places where there is less light pollution.
Very often, this involves a long hike to a great photography spot and this means that you will inevitably need some hiking equipment. Not a lot is required, but you would definitely need a good pair of hiking boots or shoes and a decent jacket.
In addition, we recommend a lightweight backpack to carry your astrophotography equipment and possibly a hiking stick and a water bottle.

Using light sources to experiment with astrophotography.
As you learn more about your new astrophotography camera, you will naturally want to experiment with more techniques and different styles for taking better photos of the night sky.
One of the most popular techniques in astrophotography is to use the light painting technique. This is achieved by introducing small sources of light into your photography for a more illuminated and interesting effect.
If you would like to try light painting out for yourself, you could shine a dim light into the object you are wishing to capture (or anything that you are keen to highlight in the picture).
In astrophotography, light painting focuses on mainly stars, but you could experiment beforehand by illuminating everyday objects, such as buildings, trees, boulders, etc.
When is the best time to take photos of the night sky?
This may seem like a silly question as laypeople believe that any time that it is dark is the best time to take pictures of the stars. However, what they don’t realize is that the moon is continuously going through phases and it is better to take pictures when the moon appears dark.
When the moon is in a dark phase, it naturally emits less light, making other objects in the sky (i.e. stars) much more visible and clear.
It is always a good idea to check when the moon is in its dark phase (a new moon) and venture out on these nights.
But what about when you want to take pictures of the moon itself? Well, in this case, you would definitely choose a night when there is a full moon and it is clearly visible.
The key is to always be aware of which phase the moon is in as this will have a huge influence on your photography.
Tools for checking the phase of the moon.
There are various tools that you can use to check on the current moon phase. Many of these tools are handy apps that you can download and consult regularly.
The following are some of the best moon phase websites and apps currently available:
- Moon Giant.
Moon Giant is an easy-to-use website that lets you know what phase the moon is in at the moment. You can enter any chosen date and it will tell you which phase the moon will be in that night, in addition to the sub-phase (e.g. waning gibbous). It will also tell you how illuminated the moon will be on any given night and this is expressed as a percentage. Obviously, you will want to photograph the moon when it is well lit and you will capture photos of the stars when it is not.
- Moon Phase Calendar Plus.
Moon Phase Plus is a great app that also tells you everything you need to know about the phases of the moon. It will also tell you how the moon is expected to look on the date you enter and you can view each phase of the moon for an entire month, giving you a great overview.
This app will help you to find nights when the sky is at its darkest and clearest for excellent star photography and vice versa for taking photos of the moon.
- Weather apps.
We also recommend that you regularly consult a weather app. The reason for this is that clouds obscure your view of the stars and prevent you from seeing what you need to photograph. Try and only take photos when there is a clear sky as you won’t be wasting your time.
Of course, there are other amazing websites and apps that you could use to check on the moon’s phase but the above are considered to be the best at the moment.

Where do I go to take pictures of the night sky?
You can really take photos of the stars and moon anytime you want to, as long as you try and avoid places with a lot of light pollution.
This is easier said than done, especially if you live in a big city. Country dwellers can easily take great astrophotography from their own backyards but if you live in the city, you probably won’t be able to do the same.
The good news is that with a little research and a few tricks, you should be able to find the ideal place for your photography.
Most astrophotographers use specialized apps and websites to find the perfect dark skies in their area. The following are some of the tools that many of them use:
- Dark Sky Finder.
Dark Sky Finder is an innovative app that gives users a light pollution map of the whole world! This means that wherever you are in the world, you should be able to find an area close to you that is not as polluted by light.
In addition, it gives you information about several dark sky sites that are ideal for astrophotography and moon and star gazing. It also has some easy-to-understand clear sky charts so you can quickly tell how clear the sky is going to be in a specific area.
- International Dark-Sky Association.
The International Dark-Sky Association is a very highly regarded institute in the field of astronomy and astrophotography.
Their goal is to try and reduce light pollution as much as possible and to keep the skies looking dark and clear.
To view their helpful information on where you can enjoy some great stargazing or astrophotography, simply visit their webpage and check if they have a designated dark sky area near you!
- Light Pollution Map.
Light Pollution Map is another excellent website that you can use to evaluate the light pollution in you local area.
Using tools like the above 3, you should be in a better position to find a great dark sky location, no matter where you are located in the world.
What do I do if I can’t travel out of the city for astrophotography?
Many folks simply can’t afford to travel outside of the city to take pictures of the sky. Whether it is a matter of time and cost, don’t despair because there are ways around this!
If leaving the city is not an option for you, the best thing to do is head over to the tallest building in your area and try and gain access to the roof.
How To Be Successful With Astrophotography.
If you are committed to being successful with astrophotography and if you don’t want it to be just another hobby that falls by the wayside, then here are some useful tips to hep you along:
- Practice as much as you can.
When it comes to astrophotography, practicing and experimenting with your camera and different techniques is key. Remember that it doesn’t matter if your pictures come out blurry or unclear when you are just starting out. As long as you learn where you are going wrong and try different ways of photographing the night sky, you should be halfway there!
- Play around with the white balance function on your camera.
Every DSLR camera has a white balance function and this will allow you to change the sky’s color in your pictures. Playing around with this function can have some great effects. You might also want to experiment by taking pictures using the “sunny day” or “daylight” option for another way of capturing unique and beautiful images.
Messing around until you stumble upon something great is part of the fun of astrophotography!
- Don’t be afraid to ask for advice.
Fellow astrophotographers are a wealth of useful information. Don’t be afraid to ask them for advice and tips. Most of them would be happy to share their tips with you and could help you to set your camera correctly for the best possible pictures.
Alternatively, consider joining astrophotography groups on Facebook as you will find some incredible information there.
- Use the manual function on your camera.
Setting your camera to the manual function is another thing you could play around with. When doing this, focus on “infinity” as you will be focusing on objects that are really far into the distance.
A great way to try this out is to practice during the day when light conditions are better. You could take pictures of faraway objects and try and perfect this skill.
- Save space on your camera.
Astrophotography involves taking countless photos in order to get the perfect one. This inevitably takes up a lot of space on your camera. To avoid reaching your camera’s space capacity, why not shoot pictures in the RAW file format (instead of jpeg)? This will give you much more space on your camera.
Editing Your Photographs.
Editing your photos is one of the most exciting parts of astrophotography! Two of the most popular tools for astrophotography editing are Lightroom and Photoshop, but it will all be down to which one you personally prefer. Here, you can edit and manipulate your pictures so that the end result is spectacular!
Astrophotography editing can be quite time-consuming but if you are dedicated to the process, it will reward with images that are beyond your wildest dreams!
Joining the Astronomy Community
Embarking on your astronomical journey is even more enriching when you connect with like-minded stargazers. In this section, we’ll explore ways to get involved with the astronomy community, such as clubs and societies, events, and observatories.
Clubs and Societies
Joining an astronomy club or society is a fantastic way to meet fellow enthusiasts who share your passion for the cosmos. Not only will you have the opportunity to learn new tips and techniques, but you’ll also make lasting friendships.
Many clubs hold regular meetings, where members share their knowledge or organise practical observing sessions, making your stargazing experiences even more delightful. To find a club near you, check out the BBC Sky at Night Magazine which often lists local societies.
Events
Another fantastic way to immerse yourself in the astronomy community is by participating in events. One great example is the occasional “Star Party,” where amateur astronomers gather for a weekend of observation and celebration of the night sky.
Keep an eye out for local astronomical lectures, workshops, and conferences too. These gatherings provide invaluable opportunities to learn from experienced astronomers and interact with others who share your cosmic fascinations. In addition, many events are also family-friendly, making them perfect for introducing future stargazers to the wonders of the universe.
Observatories
Last but not least, consider visiting observatories, which often host public events and observing sessions. Observatories provide a unique opportunity to gaze upon celestial objects through high-powered telescopes, granting access to sights that might be inaccessible with personal equipment.
Not only will this experience broaden your astronomical knowledge, but it’s also a fabulous way to meet fellow stargazers and join the community. So, what are you waiting for? Our lovely universe is waiting for you!
Further Resources and Reading
As with any exciting adventure, embarking on the celestial exploration of astronomy for beginners can be made even more enjoyable with the right resources. Lucky for us, there are numerous materials easily accessible, such as:
- Sky & Telescope’s Astronomy for Beginners: This exceptional guide offers a wealth of advice, perfect for newbie stargazers, with insights on understanding astronomy lingo, utilising sky charts and star wheels, and even provides family-friendly activities!
- The Planetary Society’s Astronomy for Beginners: Take a cosmic leap with this resource as it teaches us how to explore the night sky through various tips, from planets to galaxies, all from the comfort of our own planet, Earth.
- A Beginner’s Guide to Astronomy: Reading Resources: Want to delve deeper into the history and personalities that shaped astronomy? This compilation of reading resources introduces us to past discoveries and the trailblazers who made them come alive.
Now, what’s an adventure without some captivating tomes for those nights when we just can’t brave the elements? We’ve gathered a list of recommendations for the best astronomy books for beginners:
| Book Title | Author |
|---|---|
| NightWatch: A Practical Guide to Viewing the Universe | Terence Dickinson |
| Turn Left at Orion: Hundreds of Night Sky Objects to See in a Home Telescope – and How to Find Them | Guy Consolmagno and Dan M. Davis |
| Star Talk: Everything You Ever Need to Know About Space Travel, Sci-Fi, the Human Race, the Universe, and Beyond |
Conclusion.
As you can see, starting a hobby of astronomy and astrophotography can be a little complicated and there will be a steep learning curve. However, if you stick with it and practice as much as you can, you will find that it is incredibly rewarding and highly addictive.
Whether it’s mastering the art of stargazing with sky charts, pondering over the cosmos in one of our recommended books, or delving deep into the history of astronomy – the choice is ours!
So, let’s eagerly dive into these resources and let our galactic exploration begin!
