In recent years, the idea of having a backyard to relax in has most certainly increased in popularity. Many people enjoy venturing outside of an evening, sitting on their patio, perhaps lighting a fire pit, and enjoying the fresh air.
There are many things you can add to your backyard safe haven to create a further sense of relaxation. This can range from lights and hot tubs to gazebos and good ole’ wind chimes.
Table of Contents
Why Restring Your Wind Chimes?
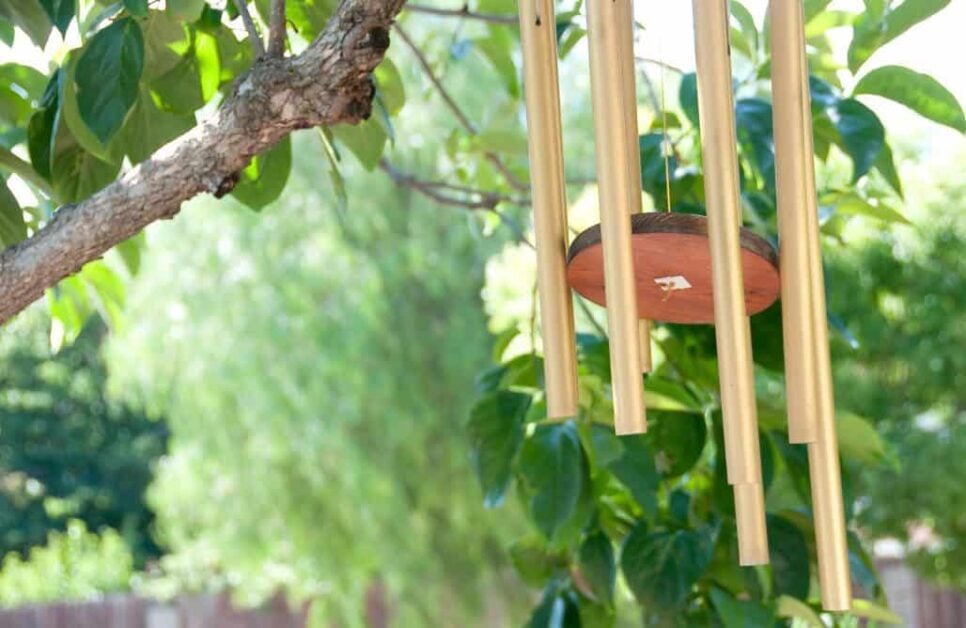
Having a set of wind chimes in your backyard can really add something special. Just listening to them blow in the breeze, filling the air with their soft tones, is truly magical!However, wind chimes are very fragile and can easily become out of tune or broken by blowing in the wind all that time.
During times when the weather is cold or windy, it is highly possible the strings of your wind chimes may become damaged. This could just be minor damage such as a small entanglement but it is possible for your strings to freeze or simply break altogether.
Also, just the age of your wind chime is enough to cause damage to the strings; Like most things, it wears with age. Damaged string means that your wind chimes will fall from wherever they are hanged and it is possible for the chime itself to break with any impact it may take.
If there are issues with the strings of your wind chimes, this definitely does not mean that you need to throw them out. Instead, follow the steps on how to fix them!
How to Restring Wind Chimes (Or Repair!)
Step 1:
The first step to fixing your wind chimes is getting some synthetic string which is strong and durable. Examples of synthetic strings include fishing line, nylon cord and polyester fibre.
It is likely that your wind chimes originally used natural string, however, the use of synthetic string does a better job of protecting the wind chimes from any damage in the future. If you have a slightly higher budget, you may wish to invest in some archery string.
This can come in different grades with some grades able to hold up to 100 pounds of weight. This is a good choice if your wind chimes are made out heavier and longer pieces of metal.
The nylon cord and fishing line is also available in different grades and is also cheaper than archery string.
If choosing either of these two options, be sure to pick a stronger grade to ensure it lasts longer and has the strength to hold the chimes as it should.
Step 2:
Before securing the new string, you must first remove the old string. To do this, remove each segment that is to be replaced by gently pulling the string out from the holes in the chimes
It is very possible you may need scissors to assist you in this job.
When all the string is out, lay out the chimes being careful to order them in the same way in which they will hang. The best thing to do when restringing your wind chimes is to remove the entirety of the old string even if only a small segment is damaged.
This means that only one type of string will be used and will help the wind chimes to hand properly and evenly.
Step 3:
Now that you are ready, it’s time to insert and position the new string. To do this, you will want to find an upholstery needle that has an eye big enough for your string to thread through it.
When you have the needle, thread the string through the eye and weave it through the various holes in the chimes making sure the string also goes through the holes in the top rings where all the chimes are held together.
If you are unable to find an upholstery needle then don’t worry. The needle can easily be swapped out for a pair of needle-nose tweezers and the assistance of your fingers to thread the string through the chimes.
Step 4: Tie ’em
Secure…secure..secure. To secure the chimes in place, you want to make a small knot. Ain to do this after each chime is restrung. It would be good to get this knot as good as possible but a messy knot will work as well.
Also, if you wish to, you can add a small bit of glue onto each knot to ensure it doesn’t come out in the wind.
Step 5:
To make sure you wind chime have been correctly restrung, you can do a pitch test. To do this, take a tuning fork or metal spoon and gently it off each of the chimes.
Listen carefully to the noise it creates and, if you’re happy with the sound each chime makes, it is likely that your restringing was successful.
Now that you have completed the restringing of your wind chimes and are happy with the sound of their calming tones, it’s time to hang them up again. Before doing this, perhaps you could consider a place where the wind will still gently move them but somewhere they are less likely to be hit with stronger forces and risk being damaged again.
When this location is chosen, simply hang them up. An important thing to do would be to ensure you take your wind chimes inside during any stormy and windy weather or when there are substantially low temperatures outside to decrease the risk of damaging them once again.

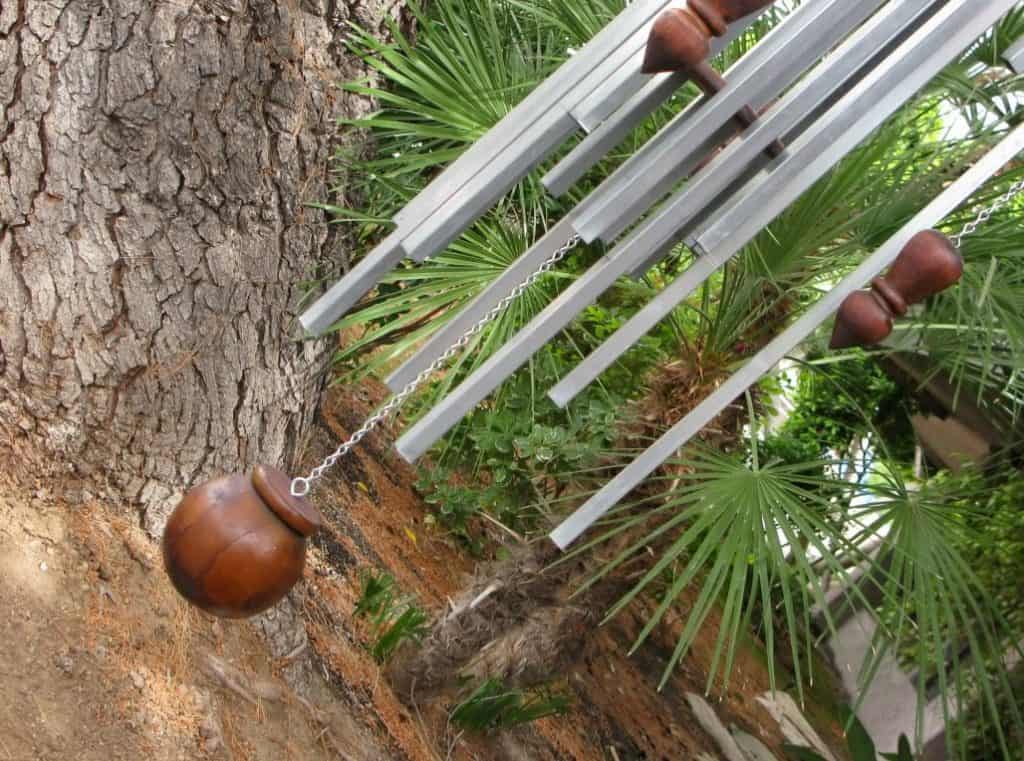
There are some variable factors you may come across when restringing your wind chimes as they may cause you to perform the task differently. For example, if your wind chimes are not connected to a top ring and instead are held together by a circular wooden block then, with the wooden piece being solid, there will be no hole for you to thread the string through and knot, glue and secure.
To combat this issue, you will want to use a staple gun to attach the string to the bottom side of the wood. If this is the case, when restringing your wind chimes, you will want to avoid putting string through each chime individually.
Instead, use one long piece of string and thread through each chime. As the string exits the hole in each chime, take the loop that has been created and staple it to the underside of the wooden block.
If the wind chimes you have include a clapper then there are ways to deal with that too. To deal with this, you want to staple the clapper separately making sure it is attached to the exact middle of the underside of the wooden block.
A clapper, for those who don’t know, is a little bit of wood that sits between the chimes. As this blows in the wind, they gently hit off of the clapper and it helps to further create and increase the sound of the chimes.

Where Do Wind Chimes Come From?
Now, before we end, where do wind chimes actually come from? Well, wind chimes are thought to have been originally used in the southeast of Asia around 3000 BCE. In addition to this, wind chimes have been found to be created by many different cultures around the world and were made with spare materials such as bamboo, iron, wood, copper, steel and some wind chimes were made with seashells.
Today, people like to have wind chimes in their backyards, The gentle and soothing tones are often associated with spirituality, meditation and mindfulness making them a brilliant decoration to include in your backyard. Some people even have wind chimes in their house hanging close by to doors and windows. When these are open, the chimes can move in the gentle breeze.
When you have wind chimes, be sure to polish them to keep them in the best shape possible. When choosing a polish, be sure to pick one that is suited to the wind chimes that you have. Some polishes are better suited to specific materials.
Conclusion
Now that you have the information required to fix the strings of your wind chimes, you will be able to keep them in the best condition possible.
Wind chimes are a brilliant thing to include in your backyard and will be great to have on a patio or porch area. As you sit at night in the fresh breeze, you can enjoy the calm that the sound of wind chime creates. As long as they are in an area where the heavy wind isn’t constantly hitting it, you should no longer have to worry about the strings being damaged again since you are using synthetic variants.
Although, as mentioned, be sure to take your wind chimes back inside during bad weather and cold temperatures to save you having to follow these steps again another time!
