
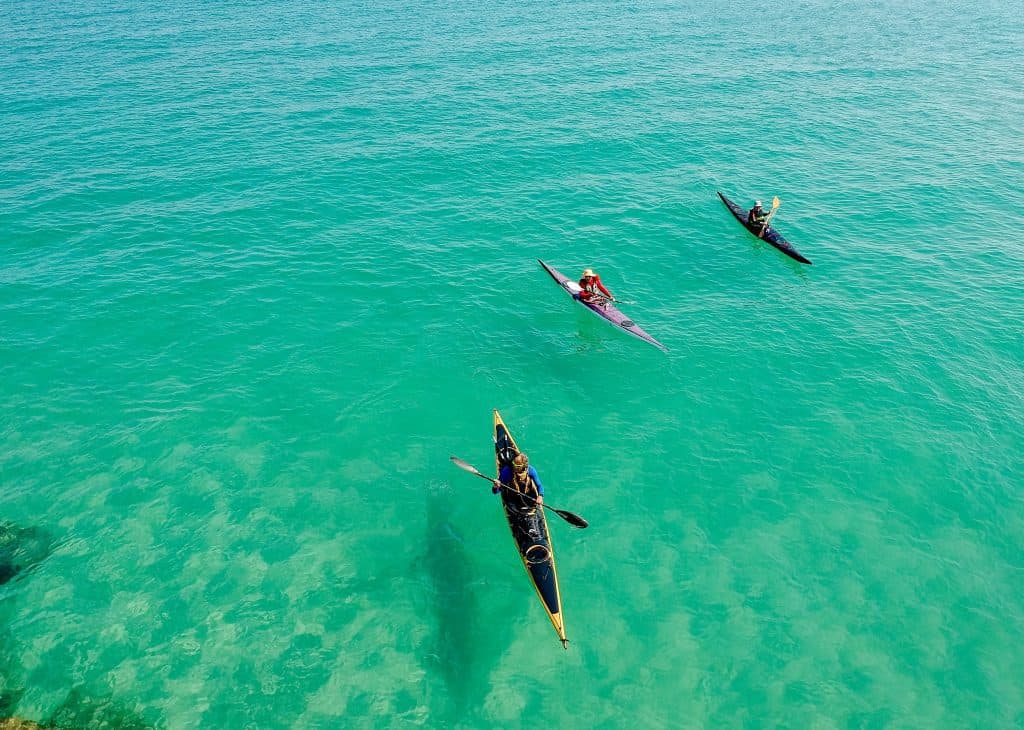
From calm waters to white rapids, kayaking is an increasingly popular sport and hobby for people across the world. Of course, some may experience a warmer journey than others, but the icy cold deeps surrounding the UK can often offer a fantastic incentive to better your technique and avoid an unwanted dip!
Here at The Hobby Kraze, we wanted to introduce you to the wonderful world of kayaking. So, in this article, we’ll be exploring everything from the origins of the sport to the know-how and tools you’ll want to invest in. In fact, here’s a list of what will be covered:
- Kayaking for Beginners: Is it for You?
- Where Did the Kayak Hobby Adventure Begin?
- What Is the Jargon to a Kayak?
- The Basics: Kayaking or Canoeing?
- Are There Different Types of Kayaking?
- What are the Types of Kayak?
- What Other Kayaking Equipment Do You Need?
- How Can You Begin to Launch Your Kayak?
- What Are the Strokes You’ll Need to Know?
- How Can You Deal with a Capsize and Work Through a Wet Exit?
- What Are Some Tips for Kayaking for Beginners?
- Where are the Best Places to Go Kayaking in the UK?
Note: if you’re here for the fun of floating on a long boat called a canoe, you’re in the wrong place. This is because a kayak hobby adventure is different to a canoeing hobby adventure. But, as this is the ultimate beginners guide to kayaking, we’ll be covering why this is later on. So, stay tuned!
Table of Contents
- 1 Kayaking for Beginners: Is it for You?
- 2 Where Did the Kayak Hobby Adventure Begin?
- 3 What Is the Jargon to a Kayak?
- 4 The Basics: Kayaking or Canoeing?
- 5 Are There Different Types of Kayaking?
- 6 What are the Types of Kayak?
- 7 What Other Kayaking Equipment Do You Need?
- 8 How Can You Begin to Launch Your Kayak?
- 9 What Are the Strokes You’ll Need to Know?
- 10 How Can You Deal with a Capsize and Work Through a Wet Exit?
- 11 What Are Some Tips for Kayaking for Beginners?
- 12 Beginners Guide to Kayaking FAQs
- 13 Where are the Best Places to Go Kayaking in the UK?
Kayaking for Beginners: Is it for You?
While this is a question you really need to be answering for yourself, we’ll make It easier by giving you a few helpful tips. After reading this guide, ask yourself this question, again. For one, kayaking is a hobby that everyone can enjoy. After all, everyone starts with kayaking for beginners.
Kayaking is actually one of the most popular sports with a growing number of participants every year. This is because kayaking is a cheap, accessible and a gateway sport to many other activities. For example; competition kayaking, a tandem kayak hobby adventure, fishing, diving, swimming, commuting (yes, you read that right) and more.
In general, there’s no charge or fee for kayaking in any tidal waters around the UK. You may, however, see a fee for parking or travelling down non-tidal waters. For example; a river is privately owned. Yet, these would be the only fees after the boat that you’d incur. There’s no engine or petrol required to run the kayak meaning you get a great trip, a cheap kayak hobby adventure and everything you need for a set investment at the start.
Top tip: here with the ultimate beginner’s guide to kayaking, the team at The Hobby Kraze wanted to let you in on a secret of the trade. When you’re kayaking and you capsize, don’t try to breathe in the water!
Where Did the Kayak Hobby Adventure Begin?

The history of kayaking takes us all the way back to approximately 5,000 years ago. During this time, the indigenous Inuit and Aleut people of Artic North America needed to be able to travel on the surface of the water to fish for their food. Which brings light to the meaning of ‘kayak’: it roughly translates to ‘man’s boat’ or ‘hunter’s boat’.
So, they would create streamlined long boats out of any material they could find. In fact, with the materials to hand, there were two main types of kayak the indigenous folk would use; one made out of driftwood and the other made from washed-up whale bones. When carved, these boats would be covered in natural kayaking equipment such as stretched animal skins and whale fat to make them waterproof. As a final addition, the boats would have air-filled bladders attached to the starboard (right-hand side) and aft (left-hand side) of the boats to increase buoyancy.
As this is a beginner’s guide to kayaking, we didn’t want to miss any pointers. You may have also seen tandem or multi-person kayaks. And, these were also the invention of the Inuit and Aleut people. However, in their time, they were called ‘umiaqs’ and were designed to carry large families along with their possessions.
Since this rich history of tribal innovation for hunting, the kayak has seen a worldwide growth and adoption. As recently as the mid-1800s, the kayak was introduced to Europe.
Here’s a brief timeline to the history of the kayak:
- 4000 B.C. – The Kayak was invented by the Inuit and Aleut people of Arctic North America
- 1860 A.D. – Sportsman John MacGregor introduced the kayak to England and Europe.
- 1907 A.D. – The wooden-framed ‘folding kayak’ was mass produced by Johannes Kleppe and other companies.
- 1928 A.D. – German-born Franz Romer tacked his 20-foot foldboat with a sail, food and water, departed from the Canary Islands and reached the Virgin Islands 58 days later.
- 1931 A.D. – Adolf Anderle took his kayaking equipment and decided to become the first person to kayak through the Salzachofen Gorge in Austria.
- 1936 A.D. – The kayak hobby adventure was no longer the sole use and kayak racing was added to the Olympic Berlin Games.
- 1940 A.D. – The folding kayak was first used in the competition ring during the first National Whitewater Championship held in America.
- 1941 A.D. – Alexander ‘Zee’ Grant paddled a foldboat through Grand Canyon National Park.
- 1950 A.D. – A recent invention of fibreglass mixed with resin began to be used to create lightweight kayaks.
- 1973 A.D. – The first inflatable and rubberised kayak was introduced with rotomolded plastic as it was more sturdy and resilient than fibreglass. These made way for the kayaks we use today.
What Is the Jargon to a Kayak?

Before we can go onto thinking about all the different types of kayak out there, we should first consider the main parts to a kayak and how these can change depending on the sport or kayak hobby adventure you’ve chosen to go into.
As this is kayaking for beginners, here’s a list of jargon for parts of a kayak and what they mean:
- Bow: The front of the kayak.
- Stern: The back of the kayak.
- Deck: The top of the kayak.
- Hull: The inside of the kayak.
- Starboard: The right-hand side of the kayak.
- Aft: The left-hand side of the kayak.
- Chine: Where the side of the kayak becomes the bottom.
- Keel: The centre line that runs under the kayak from the bow to the stern.
- Plan View: The birds-eye-view of the kayak.
- Sheer: The parts of the bow and stern that remain out of the water.
- Rocker: The part of the keel that remains out of the water.
- Deck Fittings: Attachment points on the kayak such as elastic or deck-line.
- Security Loop: A loop or bar that can be used to secure the kayak to an object.
- Carry Handles: Handles located at the stern and bow that can be used to carry.
- Seat: A place for the kayaker(s) to sit.
- Footrests: A peg or bar in the hull to help the kayaker sit upright.
- Cockpit: The hole where a kayaker enters a sit-in kayak.
- Bulkhead: Extra walls inside the cockpit to create further buoyancy.
- Hatch: Small closed compartments in the deck to store dry essentials.
- End Toggle: Bow and stern handles used to hold the kayak when submerged.
- Rod Holder: A hole dedicated to inserting the butt of a fishing rod.
- Tank Well: A depressed area at the stern used to carry large items like bags.
- Scuppers: Small holes in the hull to allow water to escape the kayak.
- Rudder: A pedal-controlled fin that can help the Kayak turn.
- Skeg: One or more fixed fins that help the kayak travel straight.
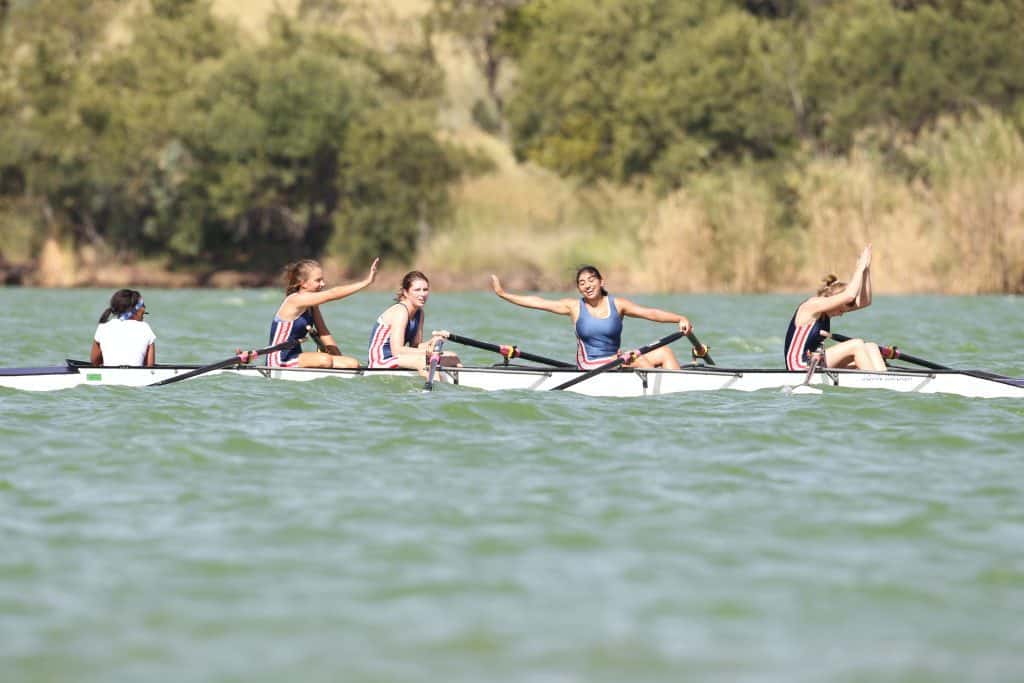
The Basics: Kayaking or Canoeing?

These two sports and hobbies are very commonly confused among those who are not surrounded by the sports. This could be due to the relative shape of the watercrafts paired with the oars that are used to power them.
However, these two sports are very different. Here’s why:
The Boat
The two boats may appear similar at first glance, but the canoe is a much bigger boat and will never have a deck (the top part of the boat that will go on top of the sporter’s legs). This is because they are designed to be a calmer sport and hobby for families and gatherings of friends.
However, the kayak is designed to be lightweight, streamlined and efficient even through rough waters as an extreme sport. As well as this, the kayak does have a deck to cover the rower’s legs (sometimes it may not but we’ll cover this in more detail later). And, the kayak is significantly smaller with most in production being made to house only one person.
The Paddle
While a paddle is a pretty universal piece of kayaking equipment also seen with other water vehicles, the paddles for the two sports can be very different. And, as this is an article about kayaking for beginner’s, here at The Hobby Kraze, we feel it’s best you’re aware of the differences. This way you can be certain of your purchase down the line!
In a kayak, the rider will have one paddle with two blades either side. These blades can be parallel or perpendicular in direction (sometimes, this is adjustable for the weather).
In canoeing, however, you’ll stumble across single-blade paddles. Whereby the oar is much shorter in length, one side has a ‘T-bar’ handle and the other has the blade. This idea is to change the side you paddle on, manually.
Canoeing
As a whole, the atmosphere for canoeing is for family and calm-water outings. The placement of the paddle and the seat in the boat is higher up and better for slow movements on an open body of water such as a large river or a lake.
Kayaking
The large double-ended paddle and streamlined shape of the boat, as well as being seated on the base of the boat rather than on a propped stool provides the kayak with additional support to become nimble and fast. This makes kayaking more of a sport rather than a calm outing.
Are There Different Types of Kayaking?

Yes, there are different types of kayaking. These relate to sports associated with kayaking for beginners, Olympic regulated sport and white-water extreme sports. The beauty of kayaking is the flexibility of it, allowing each individual person their own experience in the hull.
In fact, we’ve compiled a list of the different types of kayaking you could encounter around the globe:
- Tandem Kayaking (A)
- Recreational Kayaking (A)
- Playboating (A)
- Kayak Fishing (A)
- Sail Kayaking (A)
- Kayak Polo (A)
- Kayak Touring (B)
- Surf Kayaking (B)
- Squirt Boating (B)
- Kayak Racing (B)
- Slalom Kayaking (B)
- White-Water Kayaking (C)
- Sea Kayaking (C)
- Marathon Kayaking (C)
- Creek-Boating (C)
- Competition Kayaking (C)
- Snow Kayaking (C)
- Scuba Diving Kayaking (C)
Top tip: The Hobby Kraze has given each type of kayaking a difficulty rating from ‘A’ to ‘C’. With ‘A’ being the calmer kayak hobby adventure and ‘C’ being sports that are harder and usually avoided when kayaking for beginners.
As this is the ultimate beginner’s guide to kayaking, we suggest getting your reins in the hull before heading off into the world of extreme sports. For example. You may want to experience sail kayaking in order to give you more stability and wind-power before you get used to the man-power needed to propel.
What are the Types of Kayak?

As there are multiple types of kayaking, it’s rightfully assumed there are many types of kayak to suit. In fact, there are 10 notable kayaks on the market. While not accounting for differences in the brand-manufacturing, these kayaks will be everything you need for your dedicated kayak hobby adventure.
The main differences between these kayaks are the length, overall size, width, where the kayaker is placed, their speed, their material and extra add-ons for your sporting choice. Let’s have a look:
The Sit-On-Top Kayak
One of the biggest decisions you’ll have to make as a kayaker – aside from where in the world you want to explore – is whether you want to sit on top of your kayak or sit inside.
The decision will decide whether your feet and legs are covered or if your entire body is exposed.
With a sit-on-top kayak, you’ll likely find the kayak’s starboard and aft sides to be slightly lower. And, while a capsize will leave you in a better position to dismount and re-enter your kayak, your legs will get wet with spray. Therefore, it is a common choice within warmer destinations and waters.
The Sit-In Kayak
With the opposite seating plan to the sit-on-top kayak, the sit-in kayak offers the opportunity to insert your feet and legs into the hull of the kayak.
However, it is highly advised you are first comfortable with capsizing procedures before entering a purchase. It may be the more common result, but it is much more difficult to become free and rectify a capsize. But, don’t worry, we’ll be covering this in more detail later on.
The reason the sit-in kayak is a popular choice is down to the comfort and warmth the hull can provide the legs. Not to mention heightened aero-dynamics.
The Fishing Kayak
As the kayak hobby adventure is being increasingly taken back to its routes as a fishing and hunting vessel, fishermen are needing more gadgets to hold their equipment.
The most basic of fishing kayaks will be short to medium in length and wider at the girth. This is because their main role is to remain stable rather than be streamlined for speed and manoeuvrability. For example: a 230cm length hull. As well as this, they will have; a fishing rod holder, comfortable seat with high back, secure footwell, a paddle strap, specific grip handles and a convenient stow-away for essentials.
The Touring Kayak
The touring kayak is mainly used for distance and exploration kayaking; the main kayak hobby adventure. While some may only be used for the day, others can be used for long durations and will feature specific additions to help you on your journey.
For example; the touring kayak needs to cover water and have precision track (ability to go in a straight line). Therefore, they are generally long in hull length. Many are around the 350cm area.
The add-ons include padded seating and back support, a bulkhead behind the kayaker, adjustable footrests, a reflective deck for safety, carry handles, ergonomic leg lifters and more.
The Inflatable Kayak
The inflatable kayak is best for those with compromised or limited storage options as well as for those without a vehicle to commute. The design makes them very light to carry and easy to inflate and deflate.
The characteristics of an inflatable kayak mean they are generally small or medium in length (for a single-rower kayak) and will only weigh around 35kg. The benefits include their comfortability and toughness; however, they are not impermeable and don’t traditionally have storage.
A final thing to consider would be; inflatable kayaks are more-often-than-not sit-on-top kayaks. Meaning, you should account for the weather and temperature.
The Folding Kayak (A.K.A. The Origami Kayak)
Delving back into the history books, the folding kayak is still an option to many modern-day kayakers. With the same space-saving benefits as the inflatable kayak, the folding kayak offers mobility and flexibility. Meaning, these are best suited to apartment dwellers and those will smaller vehicles.
Some benefits the origami kayak will have over an inflatable kayak is that many come with adjustable seating options and are not subject to puncture wounds.
The Tandem Kayak
While you may have already guessed, tandem kayaking refers to the use of two rowers in the kayak much like tandem biking has two cyclists per bike. It could be your partner, your parent, your child, your sibling or an unlikely colleague through your work’s team-building exercise.
The tandem kayak is much longer in length and will have both the sit-in and sit-on-top options. And, these kayaks will often have two hatches to store essentials and valuables for each rider.
As these kayaks are specifically designed to hold pairs, it is highly advised that you don’t use this kayak to go solo. It will be much harder to manoeuvre, and you are best to buy a single kayak. With this in mind, you should always have the least experienced or least confident kayaker in front. For example; a child. This way you can steer and keep sight of the vulnerable individual.
Top tip: if you’re the scuba diving sort, the tandem kayak is a very popular option as your weighted oxygen tank and vest can sit in the front seat (with the seat removed).
The Hybrid Kayak (A.K.A. The Crossover Kayak)
The hybrid kayak is short in length and wider than the average hull for a kayak. They typically have a sit-in format but won’t include extra scupper holes for water to escape.
More often than not, going for a traditional kayak will be far better suited to your needs. For example; the hybrid is known for being so bad at track (remaining in a straight line) that a rudder is usually attached on the underside. Then, the abnormally wider nature of the small kayak lends itself to being uncomfortable to paddle.
A final note would be that the crossover and hybrid kayak does allow you to evolve the hull, adding pedals or a motor. However, after this, your kayak will no longer be a kayak.
The White-Water Kayak
When you’re looking for a more exciting and dangerous paddling adventure you could turn to the white-water kayak. However, as mentioned, this can become a very dangerous sport with rocks, winds, channels, rivers and other kayakers in your path. So, we suggest avoiding it when kayaking for beginners.
But, if this is your sense of kayak hobby adventure and you have everything you need in terms of the classification of rapids, then get on board.
The white-water kayak is generally quite short in length to optimise the control of the direction and the speed. Often you’ll see them around 275cm long. They should have a lot of volume and surface area to prevent rolling or capsizing. This can come in the form of a rounded bow and stern (front and back ends, respectively) which act against the rocks.
The Surf Kayak
The final type of kayak is rather new to the kayaking equipment industry. The kayak serves as an alternative to the surfboard but can be used in the sea and on the waves. This is because this kayak has been altered to include a three-fin thruster (this is the most common) and long hull for speed.
What Other Kayaking Equipment Do You Need?
It may come as a surprise but the kayak itself is not the only piece of kayaking equipment that you’ll need out on the water.
Luckily, here at The Hobby Kraze, we’ve gathered everything you’ll need to use as a checklist made with kayaking for beginners in mind!
- Kayak
- Double-Ended Paddle
- Water Bottles
- Kayaking Helmet
- Bilge Pump
- Spray Skirt
- Personal Floatation Device (PFD)
- SPF 30
- Snacks
- General Vision Glasses and Sunglasses
- Insect Repellent
- Torch
- Whistle
- Compass
- First Aid Kit
- Paddle Leash
- Extra Carabiners
- Maps
- ID
- Paddling Gloves
- Swimwear
- Neoprene Shoes or Sandals
- A Raincoat
- Extra equipment for your intended sport, i.e. fishing or diving gear
How Can You Begin to Launch Your Kayak?

Now you know what kayaking is, what kayak you should get, and what essentials you need to equip, this ‘kayaking for beginners’ guide can take you through everything you need to know about getting from the land and into the water.
Launching your kayak is a nice and easy process which can be explained through a few steps.
Step one would be to put on your PFD to make sure it is secure and buoyant. Step two would be to lift your kayak up to your waist, making sure the bow is in front and the kayak is facing the same way you are. Step three covers entering the water, whereby you slightly angle your kayak’s bow towards the water and wade until the kayak is floating. Step four is to step into the cockpit from the side, with your paddle behind you. Step five is to use your hands to paddle to deeper waters and continue on your kayak hobby adventure!
To know how to land your kayak, follow these same instructions backwards, making sure to remove your spray skirt before trying to exit.
What Are the Strokes You’ll Need to Know?

The instructions aren’t quite over yet. Kayaking isn’t simply wading through the paddle until you’ve got somewhere. You should probably think about what three strokes you’ll be using after launch. Here’s a small guide:
The Forward Stroke
In order to propel your kayak forward you need to do more than say ‘go’. Your inanimate kayak will need a push. So, using one end of your double-sided paddle, place it into the water around the area of your feet. Then, making sure the paddle is perpendicular to the water’s edge, pull the paddle back to your waist.
Then, take the paddle out of the water, changing the angle of the paddle to the other side of your kayak and repeating the process.
You need to paddle on both starboard and aft sides, one after the other. This will propel you forward rather than gradually propelling you to one side.
The Backward Stroke
Much like the forward stroke actions, you’ll need to place one end of your double-sided paddle into the water. However, on this occasion, rather than inserting it close to your feet, you’ll need to insert it behind you. Then, you can pull the paddle in front of you. Again, repeat on both the starboard and aft sides to travel in a straight line.
The Sweeping (or, Turning) Stroke
The sweeping stroke is slightly different to the forward and back strokes. Instead of holding your paddle with equal ends over the starboard and aft sides, you’ll need to take the majority of the paddle over to the side correlating to the direction you want to turn. For example; if you want to turn left, you’ll need to take your paddle to the left.
When ready, plunge to paddle into the water as close to the bow of the kayak as possible. Then, pull the paddle back until it reaches the stern. Repeat this action on the same side until you are satisfied with your turn.
How Can You Deal with a Capsize and Work Through a Wet Exit?

Unfortunately, a capsize can happen with even the most experienced of kayakers. Especially when there are rocks, animals, small rivers and strong gusts involved. These cannot be controlled meaning you must be aware of what to do in the situation of a capsize. And, you’ll need to become acquainted with a wet exit.
Capsizing most often occurs with excessive weight, big currents and sweeping waves. And, while modern kayaks are built with safety and buoyancy in mind, kayak flipping is still common. But, people live. So, the most important thing to do is remain calm, focus on your capsize knowledge and begin the process of exiting and rectifying the capsize.
A way to do this is to practice in shallow and calm waters. The best place is a swimming pool But, here at The Hobby Kraze, we know this isn’t always an option, so requesting permission from a canal owner or river landlord could be the next best thing.
With sit-on-top kayaks, you are not in your kayak and will be fully separated as soon as you become flipped. However, a sit-in kayak will have you securely attached and needing to be prepared for a wet exit.
When submerged, grab both sides of the cockpit rim and push yourself out of the hull. If you have a wet skirt, you’ll need to first lean forward and pull on the cord to release. Make sure you carefully read the instructions of your wet skirt as these can sometimes have different securing methods.
Once you’re out of the kayak, you can begin the process of righting. The most effective method is to place yourself on the side of your kayak, roughly in the middle. Then, try to jump over the kayak to the other side. You should aim for your mid-riff to hit the keel. The next step is to grab the other side of the kayak, pulling it with you as you head backwards into the water.
At this point your kayak should be the right-way up. If you have any accessories or baggage attached to your kaya, swim around and make sure they are placed into the kayak to avoid unbalanced buoyancy or lean.
When you and your kayak are ready, position yourself near the stern of the kayak. Then, jump over the kayak in the same motion as before with legs kicking. Yet, this time you’ll need to kick one leg over the deck. This way you should be sat over the kayak with one leg over each side and facing the bow. Scoot forward to get back into the cockpit.
A final tip for the capsize aftermath is to remove the water that has entered the kayak. This is where your bilge pump, sponge and scoop with come in handy!
What Are Some Tips for Kayaking for Beginners?
Now you’re ready to get launched, we wanted to give you our 10 best tips for making the most of your kayak hobby adventure.
- Get a lesson before you head out into the wild.
- Make sure you are dressed for the water’s temperature.
- Always wear a PFD for safety.
- Bring a change of clothes in case you submerge.
- Position your kayak perpendicular to the shore before launching and landing.
- Invest in waterproof storage containers.
- Brush-up on basic water and river language/signs of your kayaking destination.
- Know the type of kayak hobby adventure you want so you can have the right kayak.
- Always remember that other people are more important than your kayak.
- As this is the beginner’s guide to kayaking; don’t kayak alone.
Beginners Guide to Kayaking FAQs
how to start kayaking as a hobby?
Starting with kayaking as a hobby is easy. You need to first learn the basics and get acquainted with the boat. Learn the different paddling techniques, the essential equipment you need, and methods for launching your kayak. Kayaking is open to all and is arguably the most inclusive of all paddle sports out there.
You’ll also need to wear appropriate clothing such as swimwear and a short- or long-sleeve top, neoprene shoes or sandals, a hat or kayak helmet, and a lightweight jacket or rain jacket, depending on weather conditions. Most trips start off with a launch from a gradually sloping shoreline, and you should take care to avoid dragging the hull, especially on rocky, sandy, or cement surfaces.
Is kayaking a hobby?
Yes, Kayaking is considered a hobby. It is a versatile hobby that can be practiced anywhere in the world and in different environments, and it can be a relaxing pastime or a competitive sport. Kayaking is a great way to get outdoors, enjoy nature, and get some exercise.
Where are the Best Places to Go Kayaking in the UK?
The final stop on this whirlwind beginner’s guide to kayaking is knowing where you want to go. And, of course there are many beautiful places around the world that your kayak hobby adventure can lead. But, we wanted to be able to give you some beautiful and calm destinations closer to home. So, from the Scottish Highlands to the Depths of Devon’s Coast, you’ll always have everything you need to enjoy your kayaking for Beginners adventure.
- The Isle of man has some magical sea caves that can be explored with or without a guide. Make sure to take a waterproof camera for this one as you’ll want to watch the footage over and over.
- Scotland’s many lochs have beautiful, still, calm and empty waters for you to enjoy alone or with friends. To top it off, there’s no real need to worry about the loch ness monster. She’s only in Loch Ness.
- One of the UK’s most popular tourist destinations is the Lake District. And, there’s good reason, too. With beautiful scenery, open bodies of water, tourism shops and the perfect weather for a kayak hobby adventure, you’ll be set. However, do expect it to be a little busier than the Scottish Lochs.
- West Cornwall is home to a magical creek named the River Fal. Allow yourself to become entranced with the natural current of the tranquil river.
- For a more interactive and nature-filled kayak hobby adventure, you should consider Combe Martin in North Devon. It has regular visitors from nearby dolphins and seals, meaning you’ll always have a fun paddle.
- The Lee Valley White Water Centre is always an option for the thrill-seeker of the kayaking bunch. If you’re a little more experienced than kayaking for beginners, you could try entering man-made Olympic-level white water rapids in this London destination.
So, there you have it. The Hobby Kraze’s ultimate beginner’s guide to kayaking. From the origin story all the way through to the best places you can find yourself enjoying your kayak hobby adventure.
There’s really only one question left to ask. Kayaking for beginners; is it for you?
Be sure to check in for more tips and tricks on how to enjoy your outdoor adventures. Or, to learn about new one’s you’d never though of. Have you ever tried sifting for gold? Because we have an ultimate guide for that, too.
