A seam finish is any technique that you use to cover to the raw edges (i.e. the cut edges of the fabric) to prevent them from unraveling.
Seam finishes are practical; they keep the cut edges from fraying in the wash – it’s never fun to pull your new handmade garment out of the washing machine and see that it’s coming apart at the seams because the fabric is unraveling.
But finishing your seams is important for more than just the practicality of it all. They also make the inside of your handmade clothing look so much more professionally made and beautiful!

There are many different seam finishes out there, from the easy and quick to those reserved for the most adventurous of sewers.
Below, I’ll walk you through 8 of the best seam finishes, ordered from easiest to most complex (but perhaps the most beautiful).
1. Pinking Shears

If you’re just getting started with sewing, or you want to keep your sewing practice simple, finishing your cut edges with pinking shears is the easiest option beyond just leaving the seam allowances raw.
Pinking shears are specialized scissors that cut with a zigzag pattern. Because fabric doesn’t fray as much on the bias (the diagonal), cutting your seam allowances down with pinking shears will help to limit fraying. It tends to work well for tightly woven, structured fabrics, but will still allow some unraveling on less densely woven fabrics.
To do this seam finish, sew your seam as normal.

Then, cut your seam allowances down by about half using the pinking shears.

Press your seam allowances open, and you’ve got some nice, pinked edges!

2. Zigzag Stitch
A zigzag stitch takes things up a notch because you actually have to sew the edges of your fabric. It’s great because you don’t need a specialized machine – just a standard home sewing machine!
It will prevent fraying better long term than pinking shears – but some threads will still unravel over time with this technique, so it’s not great for fabric that just loves to fray.
When finishing with a zigzag stitch, I prefer to finish my edges before sewing the seam. But if you forget, you can sew the seam first, then go back in and finish the edges.
Set your machine to a zigzag stitch with a width of 3 and a length of 2.5. Then simply sew along the edges of your fabric, about 1/16 of an inch in. I find that my machine likes to eat the fabric if I try to sew right along the edge.

Next, sew your seam like normal and press the seam allowances open.

3. Overlock Stitch
An overlock stitch is my favorite method of finishing seams on projects that I want to complete quickly, but with great results. It’s very similar to the zigzag finish, except that the overlock stitch gives a lot more coverage to the cut edges, meaning it really prevents unraveling well, even on fray-prone fabrics.
Usually, an overlock stitch is done with a serger (also known as an overlocker), this is the easiest way to overlock your edges. However, some sewing machines do have an overlock stitch option – it’s not quite the same as the one on a serger, but it can work well if your machine has the capability.
Just like with the zigzag finish, I like to overlock my raw edges before sewing any seams. Just run the edges through your serger or sew along them with an overlock stitch on your regular sewing machine.

Then sew your seam up and press those seam allowances open!

4. French Seam
Now we delve into the more complicated seam finishes that give your projects a more high-end look and a gorgeous finish inside and out.
First up, French seams! This is a great seam finish for beginners that want to give their projects a little extra attention. It works best for light to medium weight fabrics – heavy fabrics can get a bit too bulky for French seams.
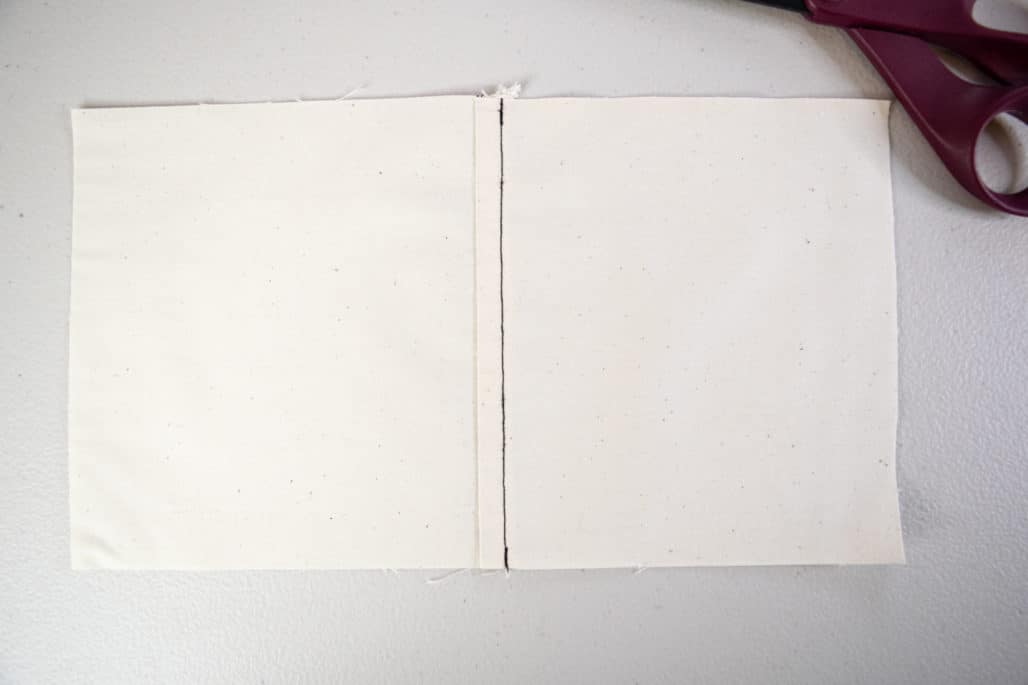
First, sew your seam with wrong sides together (yes, wrong sides!) using a ¼ inch seam allowance (we will take the rest of the seam allowance at a later step).

Trim your seam allowance down by half, to about ⅛ inch.

Next, press the seam allowances open – this helps get a nice, crisp seam.

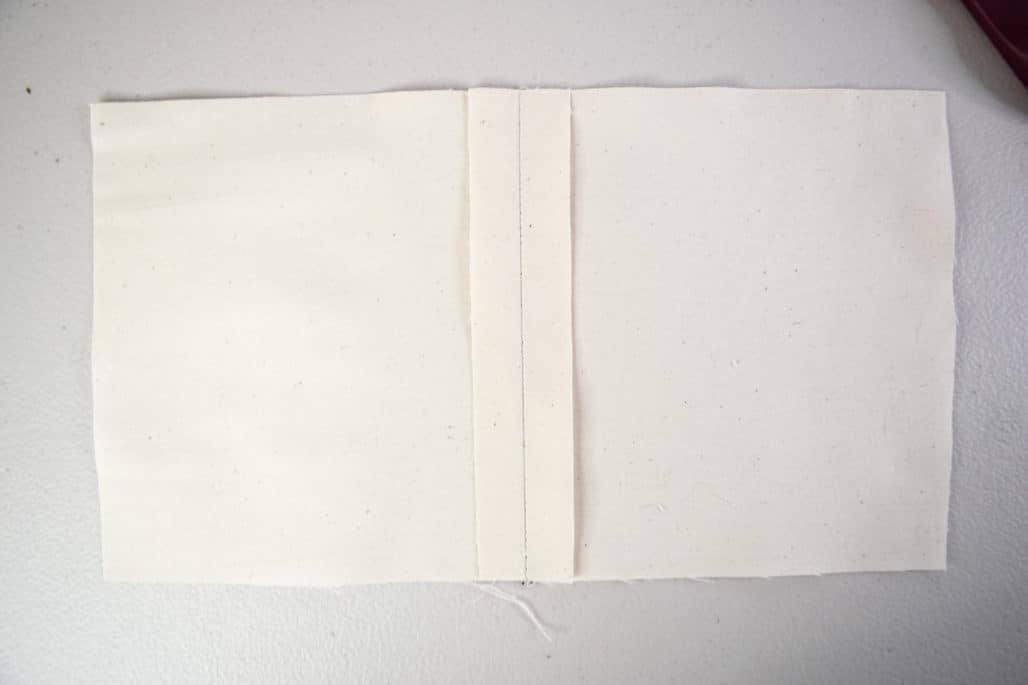
Then press the seam again, this time folding the fabric right sides together and pressing it so that your first seam is right along the edge – pin in place.


Sew the seam again, this time taking the rest of your seam allowance (total seam allowance – ¼ inch). This will encase those ragged raw edges inside of the seam, never to be seen again! Press the seam allowance to one side.

5. Flat Felled Seam
Flat felled seams are another favorite of mine – they lend a lot of strength and durability to a seam because the allowances are folded over and sewn twice. They are a great choice for hard-wearing garments and thicker fabrics like denim. Flat felled seams are also common in button-up shirts.
Start by sewing your seam with wrong sides together, using your regular seam allowance. Your stitching will be visible on the outside of the garment, so matching thread or intentionally contrasting topstitching thread will give you the best results.

Press the seam allowances open.

Then, trim one of your seam allowances down by half.

Next, press both raw edges towards the side with the shorter seam allowance.

Now the fun part! Fold the longer seam allowance up and over the shorter one, encasing all the raw edges inside. Pin in place.


Finally, topstitch the seam allowances down by sewing a line of stitching right along the folded edge.
Here’s how the flat felled seam looks from the inside:

And here’s from the outside:

6. Mock or Faux Flat Felled Seam
If you love the look of a flat felled seam, but don’t want to go through all that effort, the faux flat felled seam will be the perfect choice for you!
It gives a similarly strong finish, looks a lot like flat felled seam from the outside, but isn’t quite as clean on the inside.
To do this finish, first sew your seam as normal, with right sides together.

Then overlock the edges together with a serger. You can also let your serger trim away a bit of your seam allowance as it sews. Press the seam allowance to one side.

Next, simply topstitch the serged edge down, sewing about ¼ inch away from your first seam.
Here’s how it will look from the inside (preferably with matching thread):

And from the outside:
7. Bias Bound Seam
These last two seam finishes, bias bound seams and Hong Kong seams, give a very similar, beautifully special, look. Bias bound seams are the easier and quicker of the two, but don’t give quite as clean of a finish.
In these methods, the raw edges are enclosed in bias tape – usually in a contrasting color. This is great for garments that you want to have a high-end look and for items where you can see flashes of the inside while it’s being worn (like a coat worn open).
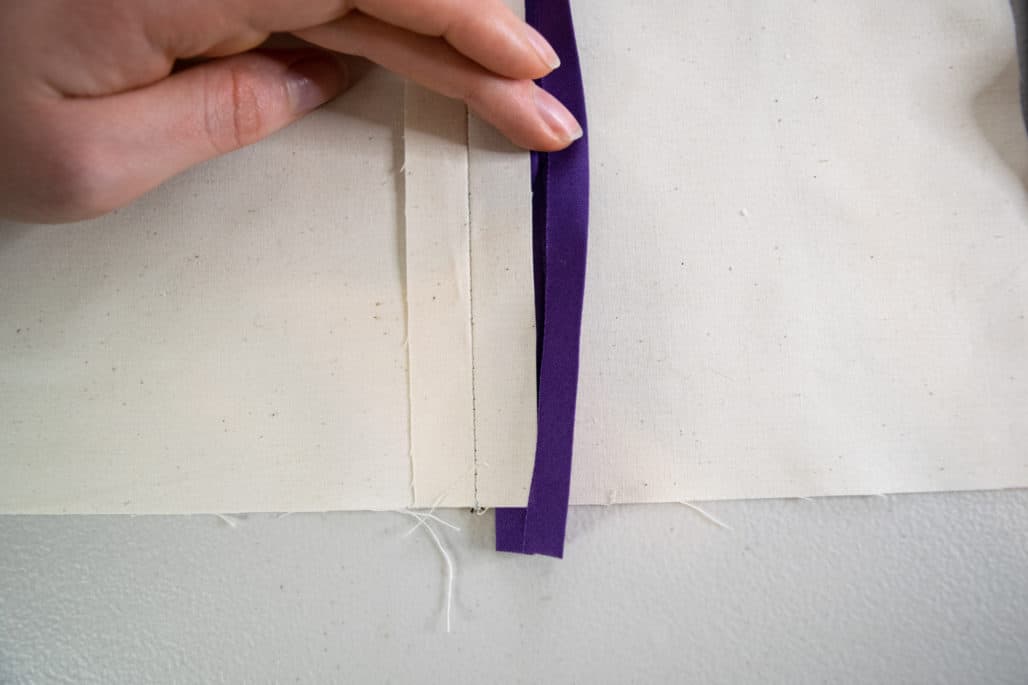
To sew bias bound seams, first sew your seam like usual (right sides together) and press the seam allowances open.
Next, cut two pieces of double-fold bias tape (you can buy it from your craft store or make your own) that are slightly longer than the seam.

Place one of the pieces of bias tape around one of the seam allowances to encase the raw edges inside the tape.
Pin the bias tape in place, making sure to pin only through the seam allowance, not the fabric below.

Repeat with the other side.

Next, fold the fabric back away from one of the seam allowances to free it up to sew.

Stitch along the inner folded edge of the bias tape to secure it in place, then repeat the process to sew the other side.

Trim away the excess bias tape on both ends – you’ve got a beautiful, contrasting bias bound seam!

8. Hong Kong Seam
Last, but definitely not least, the Hong Kong seam finish! As I mentioned, this results in a similar finish to bias bound seams but is a bit cleaner because you won’t see the topstitching so prominently on the tape.
Start your Hong Kong seam by sewing it normally, with right sides together.

Cut two pieces of bias tape long enough to cover the seam – you can use single- or double-fold bias tape for this finish.

Next, take one piece of bias tape and pin it right sides together with one side of the seam allowance. If using single-fold tape, line up the raw edge of the bias tape with the raw edge of the seam allowance. For double-fold tape, line up one folded edge of the bias tape with the raw edge.

Stitch the tape in place, about ¼ inch in from the edge. Make sure to fold the fabric away from the seam allowance so that it doesn’t get caught in your stitching.

Next, press the bias tape away from the seam. Here’s how it looks from the top:

And here’s how it looks from under the seam allowance:

Fold the bias tape over the raw edges so that the inner folded edge is lined up just past your first line of stitching.

Pin it in place.

Next, sewing from the top, stitch in the ditch (sew inside of your previous seam to hide the stitching) to secure the bias tape to the seam allowance.

Repeat that entire process for the other side.

Trim away any excess bias tape from the top and bottom. You’re left with a gorgeous Hong Kong seam – by far the most time-consuming technique, but the results are so worth it!

I hope this seam finishing guide has helped you realize that you shouldn’t skip this critical step when sewing your next project! Which seam finish is your favorite?