
Looking through the social media channels of today, we’re bombarded with stunning photos that don’t even look possible. Images of the sea, underwater shots of marine life, below the surface captures of a whole new world and more.
It simply doesn’t seem possible; technology is fragile, and we can’t even take a picture of the moon without it looking like a speck of dust caught on the lens.
But it is possible, digital underwater pictures can be your entire new ‘thing’. Especially with the ultimate beginner’s guide to underwater photography. From finding the right kit to getting the handle of how the exposure triangle works with water refracting light (big words, we know, but you’ll understand them by the end of this guide to below-the-water’s-surface photography for beginners).
Here’s everything you’ll know by the end of this guide:
- What Digital Underwater Pictures Are
- When Underwater Shots of Marine Life First Surfaced
- The Reason for Taking Sea World Photography for Beginners
- Learning to Light the Ocean with the Exposure Triangle
- The Best Cameras for Underwater Photography for Beginners
- Types of Underwater Housing for the Camera
- Top Tips for Taking Pictures Underwater from The Hobby Kraze
Before we start front-crawling to capture rare and beautiful seascapes, the team here at The Hobby Kraze wanted to get to acquainted with the other hobby that leads straight here: snorkelling and scuba diving.
Taking stunning pictures underwater requires travelling under the water’s surface so you can look down the view finder and take the perfect snap without having to put any guess work in.
For any shallow stills, you don’t even need much gear other than the snorkel, the mask and some flippers for propulsion. So, what you need isn’t going to tear your pocket to shreds. Instead, becoming acquainted to life on 71% of the world’s surface, will gain you access to a whole new underwater world, new hobbies and a healthy-yet-fun lifestyle!
Of course, we really want to focus on the wonderful world of digital underwater pictures, so we’ll point you in the direction of our other article, “The Ultimate Beginner’s Guide to Scuba Diving and Snorkelling” for more.
Table of Contents
- 1 What Digital Underwater Pictures Are
- 2 When Underwater Shots of Marine Life First Surfaced
- 3 The Reason for Taking Sea World Photography for Beginners
- 4 Learning to Light the Ocean with the Exposure Triangle
- 5 The Best Cameras for Underwater Photography for Beginners
- 6 Types of Underwater Housing for the Camera
- 7 Top Tips for Taking Pictures Underwater from The Hobby Kraze
- 8 Conclusion
What Digital Underwater Pictures Are

Whether you start your journey as a photographer and wonder about the other frames of the planet, or you start as a diver wanting to know how to perfectly capture the sights, there is always a way to get addicted to digital underwater pictures.
Either way, most underwater photography types have their own goal, style and adventure. As this is the beginner’s guide to underwater photography, we wanted to let you know you can pretty much do any of the types of water photography as long as you’ve got the will, the patience and the kit.
Here are the 9 types of digital underwater pictures you could take:
- Wildlife Imagery
- Fashion Photography
- Over/Under Imagery (Showing the Air and Sea)
- Technical Photography
- Coral Reef Imagery
- Macro Imagery (Close-Up Shots)
- Wide-Angle Photography (Wide Shots)
- Black and White Art Photography
- British Waters Imagery (Competition Category)
When Underwater Shots of Marine Life First Surfaced

Being able to see the underwater sights and spectacles used to be something only divers and scientists could do. It was a special insight into a whole new world that could only be described or drawn for others until 1856.
Then, in 1856, an English man named William Thompson brought the underwater world to a new level for all to see: surface level.
William travelled to Dorset to take pictures of the submerged bay with a fantastic interest in the marine life that lived beneath. To take the picture, he built a metal casing to hold his camera in, lowered it into the water and controlled the shutter by a line leading to the surface.
While there isn’t a copy of William’s picture out for all to see, his innovations led to other discoveries and world firsts for underwater shots of marine life.
For example, French biologist Louis Boutan was an avid diver and wanted to share his visions of the ocean floor; with this goal, a large metal camera casing, a flash and a magnesium strobe light, he became known as the first underwater photographer.
In 1899, Louis Boutan also became the first person to take a submerged portrait photograph with a Romanian oceanographer named Emil Racovitza. This picture, however, took 30 minutes of exposure sat at a depth of 134 feet just to let enough light into the lens to capture the image.
In no time at all, the word (or, image) spread and the drive to take pictures of underwater marine life became ppopular by scientists, geographers, historians and more.
In fact, it was the National Geographic who, in 1927, took and published the world’s first ever coloured underwater photographs. They captured static reef corals, small fish and crustaceans.
However, more and more people wanted to join-in the fun but couldn’t get their hands on giant camera bodies and metal casings that were required. So, in 1950, diving company Beuchat developed the first camera housing (called the Tarzan) allowing those with the French Foca camera the chance to document their underwater beach escapades.
A final milestone for the history of underwater photography came when Australian man Jean de Wouters crafted the world’s first dedicated underwater stills camera. It was released in 1963 featuring a 1/1000 second shutter speed.
Luckily, time since has only been fruitful for cameras and underwater photography with many action cameras being designed with waterproofing in mind such as the GoPro camera range.
The Reason for Taking Sea World Photography for Beginners

Being able to capture fish and marine life with the beginner’s guide to underwater photography is an unbeatable and unmatchable experience filled with new paths of adventure and stunning take-aways.
While it’s not quite as easy as grabbing a low-range Nikon from the guy online and heading out to the waterfront, it is a hobby with a crawl of benefits.
For example:
- You get to capture memories of adventures
- You can travel the world searching for the perfect picture
- It can turn into a collectible, featuring every fish the ocean
- There is increased autonomy
- You can go alone, with friends, with family, or in tour groups
- Swimming vastly increases cardio-vascular health
- You get to escape from the real world
- There’s a completely different angle to capture round ever coral corner
- It is very relaxing
- Being underwater can decrease depression and anxiety
- Submerging is good for the organs (and your height)
- It gives new control of light
- Anti-gravity effects bring new aspects of fashion photography
- You can find communities of like-minded aquatic lovers
- There’s no need to worry about set design
- You don’t have to consider paying to close an area
- You’ll quickly become a unique art photographer
- You can go anywhere at any time
- Going underwater improves blood circulation
- You’ll instantly feel free
- You don’t need a license to snorkel with photography for beginners
Learning to Light the Ocean with the Exposure Triangle
Water absorbs light very quickly, especially the reds and the yellows of the ocean. While we can see them very clearly, it can often be a nuisance trying to get our hardware to see the same thing.
Often times, you’ll find yourself taking stills of some stunning underwater scenery only for them to turn out grey, blue and cloudy. So, it’s time to switch off the auto.
In this beginner’s guide to underwater photography, we want you to be heading back onto land ecstatic with your images of the great big blue rather than frustrated with the outcome. And although it’s easy for us to suggest buying a strobe light, staying near the water’s surface and always shooting when the sun is at its highest, it can also be very restricting on what you can capture.
With this, there is something called the exposure triangle that involves changing the amount of light you allow into the lens and the camera body. It isn’t called the exposure triangle because there are 2, 4 or 5 aspects to it; there are 3 programmable features called the ISO, Aperture and Shutter Speed you could be controlling.
ISO
Your ISO (which doesn’t actually stand for anything) is your tool for digitally increasing the brightness of an image. Generally speaking, the lower your ISO number, the less noise your image will have. This is great but it also means your image will be darker so there’s a sweet spot to find.
Most cameras have a ‘Native ISO’ built-in to the settings; it gives the optimum dynamic range for what you can see and appreciate in the frame. With this, it’s always best to aim for the Native ISO where possible. Otherwise, it’s a case of looking for the lowest possible ISO number you can have without losing the exposure in the underwater shots of marine life.
Aperture
Your aperture has two jobs. The first is deciding how much light the lens lets into the camera by opening and closing (like a round shutter). The second is deciding on the depth of field (i.e., how much of your background will be blurry while your aquatic object is in focus).
The aperture number in your settings indicates the levels of light and depth-of field: the lower the number, the wider the aperture, the lighter the image and the shallower the depth of field. And vice-versa.
For underwater photography you’ll likely want to keep the aperture quite open to let-in plenty of light. However, a rule of thumb is to remember that the wider the aperture, the harder it will be to keep your digital underwater pictures in focus.
Shutter Speed
Finally, you need to keep an eye on your shutter speed. One of the most basic tips for taking pictures underwater and on land is to never shoot any slower than the size (mm) of your lens. For example, when shooting with a nifty fifty (50mm lens), don’t go below a shutter speed of 1/50 otherwise you’ll end up with blurry digital underwater pictures.
This is because the shutter speed affects how bright the image will be and the amount of motion blur that is captured as it determines how long the shutter stays open.
A faster shutter speed allows you to effectively ‘freeze action’ because it opens and closes at such a high rate but will also call for darker images. The same works the other way round; you’ll get a lot of motion blur which works well for that ‘dreamy’ underwater seascape. But this is one to experiment with.
It wouldn’t really be the ultimate beginner’s guide to underwater photography from The Hobby Kraze if the team gave you all of this tech-ridden information without giving you a hint of direction.
So, it’s all about starting back-to-front. Dictate the shutter speed with how much motion blur you want. Then, head to the aperture to determine which depth of field you want in your digital underwater pictures. Finally, this leaves you with the ISO to let the light in.
However, if it’s becoming too noisy while the image is still dark, you’ll need to get your flippers on a generic strobe light. Similarly, if the image is overexposed and the ISO doesn’t go much lower, you can get an ND (neutral density) filter that gives your lens some sunglasses.
The Best Cameras for Underwater Photography for Beginners
Now we’ve gone through the ins-and-outs of the exposure triangle to manually ensure your picture turns out perfect, we get to tell you that there are some cameras made for the job.
Oh, and there are some that come with an ‘underwater mode’, too. For example, the Nikon AW1, COOLPIX, Olympus OM-D and the Fujifilm XP140. These help you get the settings right, so you don’t have to faff quite so much with that exposure triangle.
However, there are more aspects of cameras you need to consider when you’re getting the shopping cart ready. These ones refer to the physical body of the camera rather than the settings.
As this is the ultimate beginner’s guide to underwater photography, we’ll guess you’re just starting out with cameras. And, if that’s the case, you’ll want to look at things like the Compact or Bridge camera. These cameras are very portable, easy to use and come with varying quality and features but always have a fixed lens (so there’s one less thing to think about).
However, if you are a little more seasoned behind the camera and are just wanting to know which is best for capturing digital underwater pictures and moments, you could consider a DSLR or Mirrorless camera body. These come with different lenses to suit every need. While a little more complex, they are what you’ll want to master when going from taking holiday snaps to stunning seascapes.
Finally, if you’re looking for some easy underwater fun. You’ll want to turn and look at the Action camera. This includes things like the GoPro HERO9. Built to take a beating, you can take them underwater, up mountains and skydiving as they’re sure to survive everything you throw at them.
In fact, the HERO4 and the HERO9 are the two GoPro cameras the team use here at The Hobby Kraze for everything from hiking and skiing to snorkelling and kayaking.
However, here is a list of some of the best underwater cameras (both the old and the new!):
- Canon G7X
- Canon G16
- Sony RX100
- Panasonic LX10
- Sea & Sea DX 6G
- Panasonic GH5
- Canon EOS M6 MKII
- Sony A7R IV
- Canon EOS R
- Canon 5D Mark IV
- Nikon D850
- Nikon D50
Types of Underwater Housing for the Camera

Taking a camera and dunking it under the water’s surface can be daunting to anyone who has parted ways with a sum of money just to purposefully destroy it within around 2 seconds underwater.
And, while this feeling might be a little fainter if the camera is made to be waterproof or – like the GoPro – comes with an indestructible hard-shell, it’s always best to look at the types of underwater housing for your camera.
There are two types of underwater housing to think about that depend on the types of underwater shots of marine life you’re wanting to take. The first is a soft housing case and the second is a hard housing case.
If, for example, you’re only wanting to do fashion photography, shallow water photography, coral reef photography or over/under imagery, you can opt for a soft housing case. This is because the material is often – you guessed it – softer and best for use in shallow waters where the temperature isn’t as cold, the current isn’t as strong, and the water pressure isn’t as high.
However, if you want to dive deeper than photography for beginners with wildlife pictures in the sea, our tips for taking pictures underwater include investing the big bucks.
Getting a hard housing case for your camera can sometimes be the equivalent price of your camera body. They are more durable, made with sturdier materials, use better sealants and are more designed to fit your camera and lens. With this, they can submerge far deeper than a soft housing case, some of which can reach depths of 100m without buckling under the pressure.
Top Tips for Taking Pictures Underwater from The Hobby Kraze

Before we leave you to dive in, we have 8 of our top tips from the team for this ultimate beginner’s guide to underwater photography.
From knowing how close-up and personal to get with the fishes to finding how to capture the best still picture with natural lighting in the aquatic paradise. There’s always going to be some tips that get you from the strange grey pictures of the abyss to colourful imagery of an underwater world.
Try Before You Buy
We’ve walked you through pretty much everything in terms of the right camera for your submerged treks to find the perfect still image.
However, the best tip we can give you as a beginner to underwater photography – and the best advice we can give anyone to starting any hobby – is to save the investment and dip your toes in the water first.
Gearing up to capture images down under the water’s surface can cost a few bob. So, if you can head to a rental camera shop you can get to grips with exactly how to play the underwater photography game as well as know more about the gear your hobby adventure requires.
Here are a couple to get you started:
- Hireacamera.com
- Wex Rental
- Fat Llama
- Lens Pimp
- Dv Camera Hire
- Rich Stevenson
- Video Ed
- Waterproof Media
- Backscatter
Get Close for a Clear Picture
As we’ve mentioned a couple of times, water absorbs light at a very quick rate. Especially the reds and the yellows. So, sunlight doesn’t typically come through the water’s surface and neither do many colours other than the blue/grey scale. Hence, the water being blue/grey.
However, the closer you get to the subject, the less water is between your camera and the subject and the clearer the picture (plus, the more colour you’ll capture).
As well as this, we haven’t actually mentioned the small particles in water that make you question whether or not there’s dust in your lens. And, again, the closer you get, the less likely you are to see these water particles ruining your photoshoot.
Shoot Up for Interesting Strobing
Shooting down on the coral reefs or on the fishes below is easy; it’s been done before and the pictures can often come out as uninteresting as there’s no other life in the picture to draw a spectacle.
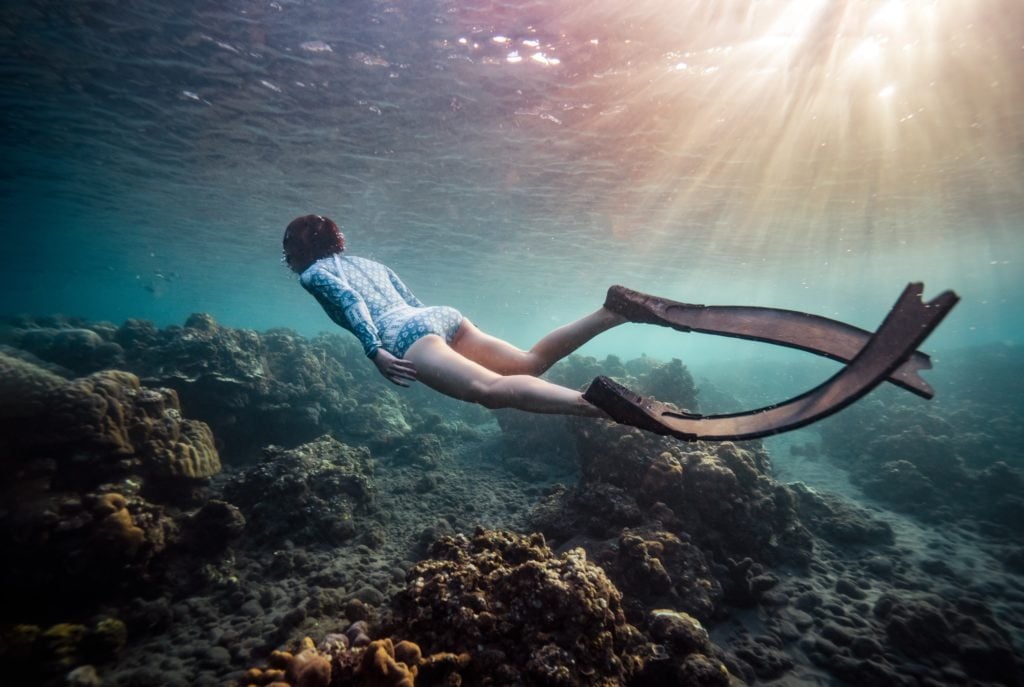
Instead, make use of the daylight penetrating the water’s surface and the stunning scenery in the underwater background. To do so, shoot upwards at your subject (if you can). Then. You’ll get fantastic rays of sunshine, details in the shadows, background life and interesting angles to show off.
Make Eye Contact
It’s a little difficult with non-compliant subjects who have their eyes on either side of their bodies, but you can certainly try.
Fishes look around, this includes looking down the barrel of the lens at some point. And, when they do, press the capture button, get the shutter to go off, strobe the subject and immortalise the perfect moment.
This rule of thumb isn’t just for underwater photography and fish. It’s actually used by any wildlife photographer. The idea is to always keep the eye in focus and sharp so anyone looking at the image can feel more connected to the subject.
Stay Patient
Again, just like any wildlife photographer, you need to be patient. Whether it means sticking around with your oxygen tank and scuba mask for a few hours or coming back the next day because you didn’t quite capture the atmosphere and school of fish right.
It’s probably only one of very few hobbies we’ll mention here at The Hobby Kraze that does require so much waiting and patience. But, with any tips for taking pictures underwater, it’s certainly worth it.
Whether it’s baiting out an octopus from a coral reef hide-away or waiting for a specific type of fish to come swimming around the corner. It could even be a case of waiting for the right light to shine through the ocean’s surface or finding the right manual settings to get the job done right. Patience is key.
Take Advantage of Kit Maintenance
So many underwater photographers fail to do basic maintenance checks or cleaning on their kit and then remain surprised when something rusts, seizes, cracks or chips when they next dig it out of their scuba bag.
It’s important to remember that technology and water simply don’t mix. And, while we’re pushing the boundaries with the ultimate beginner’s guide to underwater photography, it’s no excuse to neglect due care.
To effectively clean and maintain your camera, make sure you’ve rinsed your housing with fresh water before allowing it to dry fully. When it comes to the camera body, inspect for water leaks, pressure damage and dust build-up before putting back into its protective casing for storage.
Respect the Environment
In short, the more you respect the environment, the more marine life there will be to capture the next time you decide to do an underwater photoshoot.
Making sure you leave no trace of you being in the water means not brushing against any corals, not capturing any wildlife, not allowing debris or rubbish to fall into the water and cleaning the environment before you leave.
Another way to ensure you’re not going to damage your underwater secret garden is by keeping your snorkelling, scuba diving and buoyancy skills in check to swim with care and control.
Conclusion
Now it’s time for you to leap backwards off the dinghy with your new photography for beginner’s skills and equipment in-hand.
Let us know what you think about this introduction to photography in the great wide blue and what else you’d like to know. Here at The Hobby Kraze, it’s our job to make sure you start your new adventures in a hobby with the toolkit and knowledge that makes it enjoyable and lasting.
Don’t forget to share with everyone you think would want to join you on your deep-sea dive and check out all the other fun and exciting new hobbies you could shake a stick at with our Ultimate Beginner’s Guide series here at The Hobby Kraze.
