
Are you growing tired of looking at the same old graphic on your surfboard? Is your board suffering from peeled and chipped paint? If you answered YES to one or both of them, it’s high time you give your board its much-needed makeover before heading out to your favorite surf spot.
Like everything else, you can customise your surfboard according to your taste and preferences. Giving your board a paint job is not difficult at all. All it takes is a little bit of inspiration, creativity, and few coats of paint, and you’re good to go!
So, how to paint a surfboard? Here is a Quick Summary of Steps:
- Sand the board: Start by sanding the entire board with 80 grit sandpaper. This will help the paint adhere to the board better. Then, sand the board again with 220 grit sandpaper to create a smooth surface.
- Clean the board: Use a damp cloth to wipe down the board and remove any dust or debris.
- Tape off the design: Use painter’s tape to create the design you want on the board. Make sure the tape is secure and there are no gaps where paint can seep through.
- Paint the board: Apply the paint to the board using a paintbrush or spray paint. If using acrylic paint, apply multiple coats and let each coat dry completely before applying the next. If using spray paint, apply light coats and let each coat dry before applying the next.
- Remove the tape: Once the paint is dry, carefully remove the painter’s tape to reveal your design.
- Apply clear coat: To protect the paint and give the board a glossy finish, spray a clear coat over the entire board. Make sure to follow the instructions on the can and apply multiple coats if necessary.
- Let the board dry: Allow the board to dry completely before taking it out into the water.
Table of Contents
- 1 Can you paint your own surfboard?
- 2 What kind of paint should you use on a surfboard?
- 3 Spray paint vs. Paint pens- Which is better?
- 4 How to paint a surfboard for beginners
- 5 What other materials do you need to paint a surfboard?
- 6 What design should you paint on your board?
- 7 How do you prepare a surfboard for spray painting?
- 8 Cover the Traction Pad and Fin Boxes with Masking Tape
- 9 How do you lay out a design on your surfboard?
- 10 What techniques can you use when painting a surfboard?
- 11 How do you paint detailed designs on a surfboard?
- 12 Posca Paint Pens Guide
- 13 If I made a mistake, how do I fix it?
- 14 Apply clear coat or varnish as the last layer of your board
Can you paint your own surfboard?

There’s no reason why you can’t paint over your surfboard. Instead of paying someone else to give your board a fresh makeover, it is more practical and sensible to perform this activity by yourself, or perhaps with a few of your friends or loved ones. No matter the skill of a professional artist, nothing can translate your vision perfectly into reality than yourself.
You can exercise complete artistic freedom by painting your board at home; without the prying eyes to criticize your work and disturb your workflow. But before you set out painting your surfboard, you need to familiarize yourself with the fundamentals of surfboard painting. You also need to prepare the tools, painting supplies, and products beforehand to ensure that you are going about the project properly.
What kind of paint should you use on a surfboard?

There are a few things that you need to prepare for your first-ever surfboard paint job. You may already have some paints at home, while you may purchase some from home improvement stores. Of course, paint is the essential material in this activity. So, what is the best type of paint to use for surfboards?
Experts recommend using acrylic paints due to their outstanding adhesion, long-term flexibility, durability, and ability to retain color and gloss for the long haul. Avoid using enamel-based paints as they turn yellow quickly, and are more likely to crack and peel, thus ruining your beautiful paint job altogether.
You may also use paint markers to give your board a beautiful streaky effect. Paint pens allow users to blend two or more colors, giving you more freedom to customize based on your personality. Ideally, use a combination of acrylic spray paint and paint pens for the best results. The possibilities are virtually endless simply by using the correct type of paint for your surfboard. Posca and Sharpie paint pens are the best for do-it-yourself surfboard painting.
Spray paint vs. Paint pens- Which is better?

Decide on whether to use spray paint and paint pens during the planning stage of creating a design for your board. Unless you are a pro with advanced skills to use both paint pens and spray paints, we highly recommend sticking to the use of the latter. Acrylic spray paints are the best paint option if your design requires more solid colors, crisp straight lines, subtle spray effects around solid colors.
On the other hand, paint pens are ideal for more detailed board designs.
How to paint a surfboard for beginners

It’s always best to do a paint job on a brand-new surfboard and plain white surfboards since they still have that sanded matte finish and free from wax, grease, and other contaminants. However, most of the time, we only think of painting our surfboard when it starts to show blemishes, paint chipping, and other imperfections. Before you can begin painting an old board, make sure to remove all the wax with a wax remover or paint thinner for a clean finish.
What other materials do you need to paint a surfboard?

Just like any other water sport, there are clothes that you should never wear to paddleboarding. One of those clothes is cotton clothes. Cotton easily absorbs water. This makes you heavier, thus, making it harder for you to move. If you fall on the water, you’ll realize that you feel twice as heavy.
Another clothing no-no is a pair of rubber shoes or sneakers. You don’t want your shoes to get ruined by water. Besides, most shoes aren’t waterproof. You will just damage them. They will also be heavy once they get wet.
If you’re unsure about what to wear and what not to, a good point to consider is whether or not you’ll be comfortable with your clothes when you get wet. As a beginner, you will most likely fall on the water. Are you comfortable wearing a cotton shirt when you do? If you don’t, then don’t wear it. The same goes for other fabric types.
What design should you paint on your board?

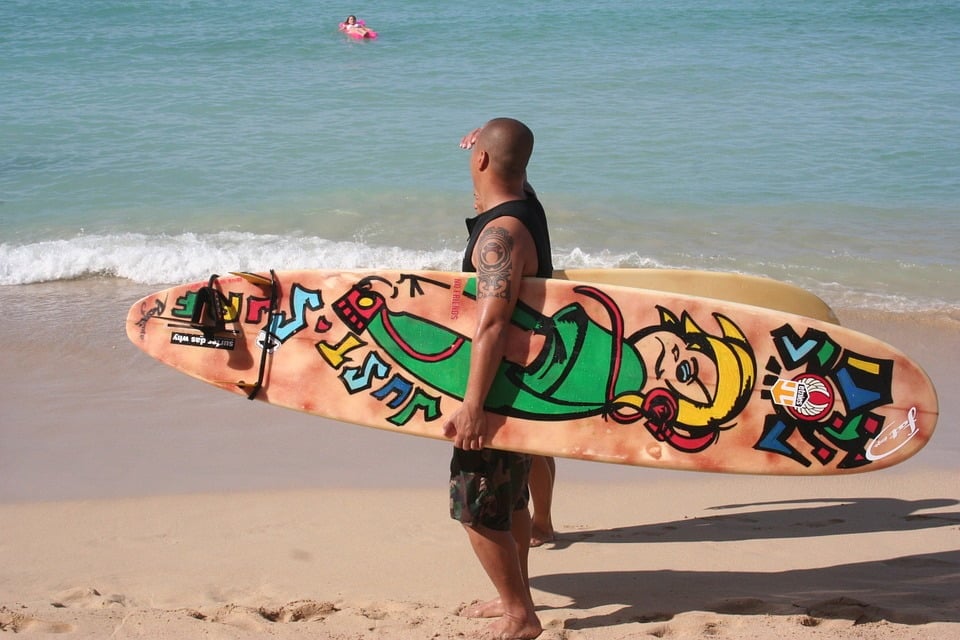
There’s no point in custom painting your surfboard without infusing a little bit of your creativity. Since you’re already spending time on this project, why not go all the way and create a unique design that will make your surfboard stand out from the crowd. Remember that your surfboard reflects your personality and is an extension of yourself when you’re out there riding the waves. Draw your own design, or copy an artwork that you like and paint them on your surfboard.
How do you prepare a surfboard for spray painting?

One of the most critical steps you need to take before the actual painting of your surfboard is cleaning. No, we aren’t talking about taking a clean cloth and wiping the whole surface once. As preparation for its upcoming paint job, a board needs to be cleaned thoroughly. Traces of old wax, grease, mineral spirits, and rough spots should be removed from the entire surface to ensure a flawless paint job.
Cleaning the board not only gives you a smooth surface to work on but also removes wax residue and ensures that the paint will efficiently adhere to the board and will not peel after a few sessions out in the sea. To remove all traces of wax, use a paint thinner or nail polish remover, also known as acetone. To give the paint something to stick to, it’s best to give your board a sanding with light sandpaper with 300 grit, or you may use an electric sander during this step, too. Remove excess material with a wet rag or paper towel and dry completely before you start painting.
Cover the Traction Pad and Fin Boxes with Masking Tape
You only want to paint and draw on the surfboard, so make sure to protect the traction pad and fin boxes using painter’s tape, so you can avoid painting over them. Before working on your board, wear gloves to protect your hands from harsh paint chemicals and ensure a flawless spray-painted finish.
How do you lay out a design on your surfboard?

It would be best if you tape the surfboard from rail to rail. To ensure that other areas of your board remain clear of paint, make sure the tape overlaps on top of itself about 1/4 inch with each piece of tape. Draw your final design on top of the tape. It should be strategically drawn in the area where you want to showcase your design. Using a knife or razor blade, cut the design out. Do not place too much weight while cutting the design. This is to prevent the knife from breaking into the glass portion of your surfboard.
What techniques can you use when painting a surfboard?

Apply a thin coat of paint on your board. Ensure that the paint coat is fully dry before moving to the application of other colors for best results. Generous application of paint will result in the colors running on top of each other. Additionally, thick paint coats take a longer time to dry and are generally messy when painting surfboards.
One excellent technique that pros do during DIY paint jobs is applying a thin layer of primer before painting solid colors. Once dry, you go back and lightly sand the board using sandpaper. Make sure to brush it off before applying the subsequent layers of paint on your board.
If you are using spray paint, make sure to spray about a foot away from the surfboard to ensure a thin and even application. Spraying at a close distance will leave unwanted droplets on the board, with excess paint sliding down the unpainted portions of the board. To get a uniform and professional finish, we recommend using high-quality spray paint. Do not forget to give the can a little bit of shake before spraying on the pigments over your board.
Here are helpful acrylic paint spraying techniques for beginners:
- Apply a “tack coat,” a light coat that will facilitate the efficient adherence of subsequent paint coatings. To achieve this, simply spray a thin layer of paint directly over the board.
- Next, apply the base coat, but make sure not to overdo it! Create a thin and even base coat layer so the paintwork doesn’t add too much weight to your board.
- You may combine two to three colors to create a unique hue or create an ombre or fading effect.
- Ideally, use lighter colors, as dark-colored acrylic paints will heat your board quite quickly once exposed to the sun resulting in delamination.
How do you paint detailed designs on a surfboard?
Once you’ve covered the board with a layer of paint, leave it to dry for 10 minutes before applying another layer. Once done, leave the board to dry for 3 hours. For more intricate or detailed drawings on your board, you may opt to paint by hand using Posca pens in your desired colors.
Here is a helpful tip on how to paint a surfboard using Posca paint pens: Make sure to prime your pens before painting directly on your board. With the cap on, vigorously shake the marker to move the ball inside the barrel. On a blank canvas paper, press the thick tipped marker down a few times to facilitate the smooth transfer of paint. Always remember to replace the cap tightly after every use.
Posca Paint Pens Guide

If you want to place drawings on your surfboard using Posca paint pens, it’s always best to have a greater understanding of your painting supplies and tools. The pen type will depend on the style and finish you want to achieve when it comes to painting pens.
- PC-1M (1mm) – PC-1M pens have extra-fine tips perfect for fine detailing and lettering.
- PC-3M (1.5mm) – This allows for precise drawing and coloring while still fine enough to be used to create black outlines and lettering.
- PC-5M (2.5mm)- This is a multi-purpose pent that comes in a wide array of colors and is ideal for all types of drawing applications.
- PC-8M (8mm)/PC-17K (15mm)- This paint pen is characterized by its thick tipped marker and is the best option for creating one solid color or covering large areas.
To avoid streaks, keep your hand and arm elevated to avoid ruining finished painted areas. Although paint completely dries fast, it never hurts to be extra cautious. You may also use clean sheets of paper or cotton to reduce contact between your skin and the paint.
If I made a mistake, how do I fix it?

You can choose from a few quick fixes if you commit a mistake while spray painting your board. If it’s early in the work, the best course of action is to start over. Use nail polish removers to wipe out the paint. If it’s a minor mishap, you may wait for the paint to dry and then paint over the top. You may also opt to use sandpaper to sand down the paint and then paint over to avoid multiple layers of uneven color.
Apply clear coat or varnish as the last layer of your board
When you’ve finally finished, make sure to leave your entire board to completely dry overnight.
To protect your board from harsh elements like sunlight, saltwater, sand, and wax, it is recommended to apply a clear coating or varnish as its final layer. You should apply between two to three coats of preferably UV-resistant clear protectors to ensure the board has ample protection despite regular use. Let the clear coat or varnish dry for a few hours or overnight to ensure that it is 100% dry before you head out catching waves again!
