
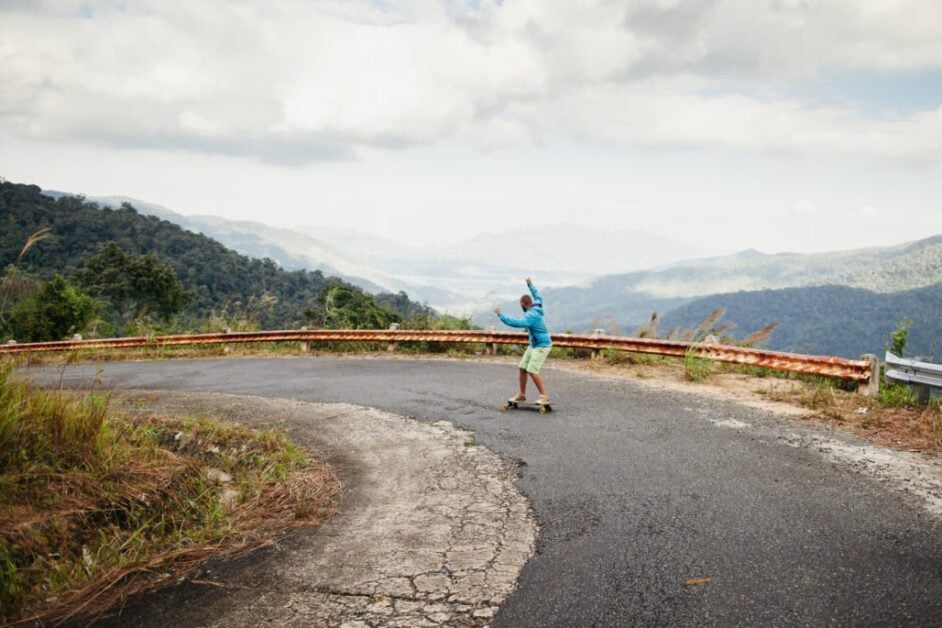
Aren’t you amazed by how some guys fluidly and graciously ride on their longboards? Their movements seem so natural; as if they’re just floating on air. Do you notice how they make an S pattern as they roll? This move is called carving, and you’d probably already know about it.
Carving is done not only on longboards but surfboards and snowboards as well. There are other few known longboarding disciplines such as cruising, downhill, freeriding, freestyling, and dancing. Carving is among these riding disciplines and is a must to learn by every newbie longboarder.
Table of Contents
Why Do You Need to Learn Carving?
Before you learn other longboarding disciplines, you need to learn the basics of carving. Why? Take a closer look at how the other riding styles are done. Cruising is often used as means of commuting. It may basically involve moving around by just kick pushing your board. But how can you maneuver if you don’t know how to carve?
Freeriding involves riding downhill. You can control your speed by doing some maneuvers and sliding. Imagine how you can maneuver in a downhill ride if you can’t carve. Do you think it’s possible? Sometimes, the carving move is used as a preparation for a slide.
Freestyle riding also involves carving, though it’s not focused mainly on speed. Instead, freestyle focuses more on technical tricks, which as mentioned, may also involve carving. The downhill ride is similar to freeride but involves a high-speed ride. Carving is an essential move when doing a downhill ride, especially when approaching corners or curves.
Meanwhile, dancing is showing off your balancing skills. You move around the board doing some feet crossing movements. Carving is an essential skill while you perform dancing on a longboard. Why? Because some moves would involve carving just right after performing some dance moves.
So, are you ready to learn how to carve on a longboard?
The Basics of Longboard Carving
Some professional longboarders suggest that you try to draw imaginary curves on the track and you move accordingly. This way your moves will be guided and you can make sharp or wide turns as you desire. The turns are initiated by alternately shifting your weight into each board edge. To do this, you need to press your toes, then your heels on the board rail alternately. This move is called rail shifting.
You get to make a sharper turn when you apply more weight and pressure to the rail. With persistent and consistent practice, you can perfect this maneuver in no time. The basic steps seem to be simple. But in reality, you need to practice a good balance while shifting your weight and pressing your toes and heels alternately. Now before you move on to actual practice, you need to prepare some important things first.
First Things First: Always Think of Safety

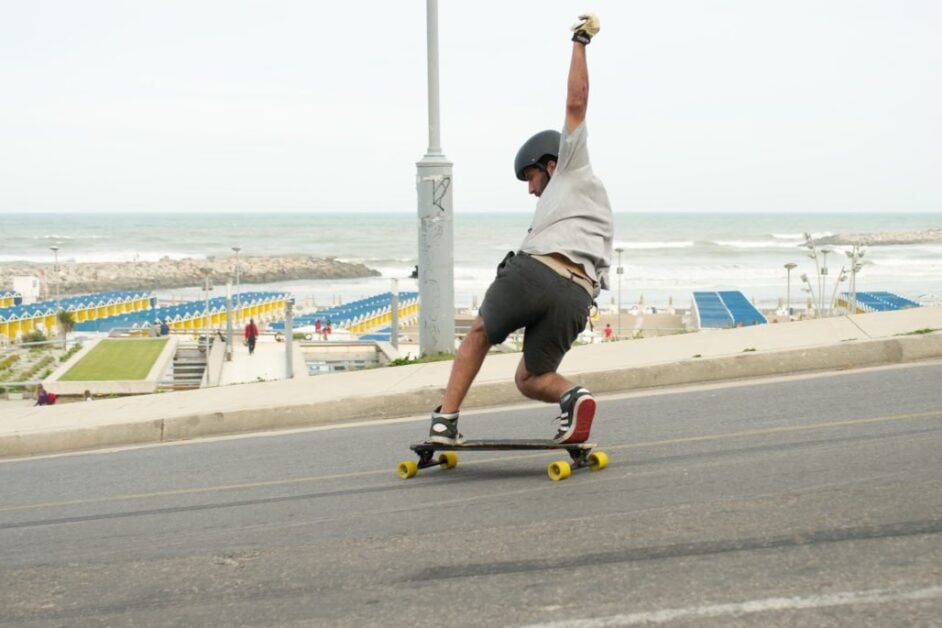
Safety should always be on top of your priorities when longboarding. You wouldn’t enjoy longboarding for long if you get permanent injuries for your negligence. A helmet alone is not sufficient to protect you, though you’d be safe from severe head injuries. Therefore, always wear complete gear. Make sure to put on your helmet, knee pads, elbow pads, and gloves.
Now that you’re completely protected, you’re ready to head out to practice longboard carving. Speaking of safety, try to find a spacious parking area with very few people or minimal vehicle traffic. Avoid practicing on a busy park or a street with high-volume traffic. Since you’re a beginner longboarder, you wouldn’t want to be a threat to other people while you practice, would you?
A street with a very shallow slope would also be a perfect location to practice. But find one that is closed to traffic or has very little vehicular movement. You see longboarding is not just all about fun and excitement. You also need to be responsible for yourself and to others as well.
So, what’s next?
Details of Longboard Carving
You already have an idea about the basics of longboard carving. Now you’re going to learn about the details. You need to master two things to perfect the carving move. One is the toeside and heelside carving, and the other is weight shifting for a fluid carving motion.
But before you practice carving, you have to be aware that the direction of your turn depends on your stance. So, are you a regular rider or a goofy rider? How do you know if you’re a regular rider or the goofy one? Here’s one way to determine your natural stance.
You need to ask a friend to help you determine your natural stance. While standing with feet close together, ask your friend to push you forward with just enough pressure to make you lose your balance. What foot did you move forward to maintain balance? If it’s the left foot, your natural stance is called the regular. You’re a goofy rider if you step your right foot first.
So, what’s all about this regular and goofy rider thing? It’s important to know about these stances so you’d understand better the detailed instructions of longboard carving. Knowing these stances will prevent confusion on your part. Turning left and right would be confusing if the stances are not clear with you.
Toeside and Heelside Carving: Regular Rider vs Goofy Rider
If you’re a regular rider, your natural stance is left foot forward. Therefore, you will be facing the right side of the board. Got it? Now, what happens when you put weight on your toes? What about when you shift your weight on your heels? By now you probably have a clearer picture of the carving turns.
If you got this right, you’d be turning right when you apply a toeside turn and you’d be turning left if you apply a heelside turn. On the other hand, if you’re a goofy rider, you’d be facing the opposite direction. Therefore, if you apply pressure on your toes, you’d be turning towards the longboard’s left. Lean backward on your heels and you’d start to turn on the right side of the board.
You may now practice the turns using your natural stance. How did it go? Give it more practice and discipline, you’ll get used to it and develop a natural flow. Now you can move on to the next lesson, weight shifting.
Weight Shifting for a Fluid Carving Motion
Imagine carving by just applying alternating pressure to your toes and heels. How do you think you would look like? Of course, merely pressing your toes and heels can turn your longboard in different directions, but it’s just not enough. You’d want something that would make you look more professional by moving in a fluid carving motion.
You can only achieve this fluid carving motion by learning the weight shifting technique. You need full-body coordination to achieve a wave-like motion. Start with a toeside turn and your head should turn towards your target destination. Simultaneously, rotate your shoulders by moving your front shoulder towards the direction of the turn.
Imagine you’re throwing your body to the turn while your hips, knees, and ankles move in flawless coordination. Just right after the toeside turn, you’re now prepared for the heelside turn to complete the S-curve motion. Again, start with your head by turning it in the opposite direction. Follow it up with the rotation of your shoulders towards the direction of the turn.
Again, you need to coordinate the shoulder movement with your hips and lower body in the direction of the turn. For a more fluid motion, open up your chest during the shift. Slightly spreading your arms and keeping your knees bent will help keep your balance. Can you imagine how you look while doing the weight shifting?
It’s only natural that you get a stiff body carving on a longboard for the first few tries. You may lose balance sometimes but it’s normal. Most professional longboarders went through the same experience. Falling off the board is fine; you’re completely protected with the safety gear anyway.
Wrapping Things Up
Longboard carving is not only fun, but it’s a very useful skill for any longboarder to learn. You cannot learn other longboarding disciplines without perfecting the carving technique. Carving not only involves your toes and heels; you also need full-body coordination to achieve that fluid, wave-like motion.
When practicing longboard carving, you should always consider not only your safety but the safeness of others as well. For your safety, regularly wear complete protective gear. Make sure each gear is well-fitted, not too tight and not too loose.
Find a place where there are only a few people around or minimal vehicular traffic. This is to minimize the risk of injuring others or getting involved with vehicular accidents. Practice makes perfect, as the old saying goes. Always keep the discipline, practice with patience and dedication. Now, are you ready to impress some friends with your flawless longboard carving?
Sharing is caring!
